Server Information
Basic information
MuOnline Land is a free Season 6 Episode 3 Mu Online private server — a fan-run version of the classic Webzen MMORPG. It runs the Season 6 Episode 3 content with experience rate 4x and drop rate 65%, a reset system at level 400 and a Grand Reset option for veterans. Launched June 2026 and online now.
How to start playing
- Create a free account.
- Download the game client and install it.
- Log in, create your character in Lorencia and start leveling toward your first reset.
Reset System
The core progression loop is the reset: when you reach level 400 you reset your character back to level 1 in exchange for keeping your power and earning extra stat points. Stack resets to climb the reset rankings.
Once you accumulate enough resets, perform a Grand Reset for a permanent prestige bonus and a place at the very top of the ladder.
You reset in-game at the reset NPC in Lorencia.
What a reset costs
Reach level 400, then reset at the NPC in Lorencia. The Zen cost starts at 10,000,000 and grows with every reset, and each reset also consumes one of each of the jewels below:
 Jewel of Chaos
  Jewel of Bless
  Jewel of Soul
 Stat points per reset
Your stats are reset every reset — all invested points return to your free pool and your build starts fresh from your class base. On top of that you receive a fresh grant of stat points that stacks with every previous grant, so your point pool keeps growing:
- First 4 resets: +2,400 points each (Dark Wizard, Dark Knight, Fairy Elf, Summoner) or +2,800 each (Magic Gladiator, Rage Fighter, Dark Lord).
- Reset 5 and onward: +1,200 points each (DW / DK / ELF / SUM) or +1,400 each (MG / RF / DL).
Points accumulate until you hit each class's stat cap — 57,000 for every class, and 65,000 for the Dark Lord:
| Milestone | DW · DK · ELF · SUM | MG · RF | Dark Lord |
|---|---|---|---|
| Per reset (1–4) | +2,400 | +2,800 | +2,800 |
| Per reset (5+) | +1,200 | +1,400 | +1,400 |
| After 4 resets | 9,600 | 11,200 | 11,200 |
| After 10 resets | 16,800 | 19,600 | 19,600 |
| After 20 resets | 28,800 | 33,600 | 33,600 |
| After 30 resets | 40,800 | 47,600 | 47,600 |
| Max points | 57,000 ≈ 44 resets | 57,000 ≈ 37 resets | 65,000 ≈ 43 resets |
Pace & catch-up
- Resets are limited to 4 per season week, counted cumulatively: if you join late or take a break, you can burst several resets in a row until you're back on pace. Nobody is permanently behind.
- Players below the expected pace hunt with a growing catch-up EXP bonus until they close the gap, while the very top racers slow down slightly with each reset — the race stays tight all season.
- Blood Castle bonus EXP also grows every season week — event runs matter more and more as the season goes on.
MU Helper
The MU Helper is the built-in auto-hunt assistant. Open it in-game (the Helper button on the main bar), pick a skill or attack, set a hunting radius and let your character farm monsters, pick up items and use potions automatically while you are at the keyboard.
The Helper can be started as early as level 15, so you can put it to work almost from the moment you create a character.
You decide exactly what it picks up: set filters for the items you want to keep — jewels, excellent gear, ancients, zen and more — and everything else is left on the ground. Combine that with auto-potion thresholds and it's the easiest way to grind experience and zen toward your next reset while keeping your character alive.
Season & Roadmap
The new season starts on July 17 at 18:00 (GMT+3) with a completely fresh database. Until launch the server runs an open beta — log in, test everything and report what you find. All beta progress is wiped at launch.
Content unlocks week by week, so there is always a fresh goal ahead:
| Weeks | Unlocks |
|---|---|
| 1–2 | Boxes of Kundun +1 and +2 only; Wings LVL 1 (DL/RF can wear DK/DW W1); a pure leveling race |
| 3–4 | Kundun +3; Loch' Feather/Crest starts dropping |
| 5–6 | Kundun +4; Wings LVL 2.5 recipe and Q3 with max 20 ML and Balgass event start |
| 7–8 | Kundun +5; Wings LVL 3 recipe and max 50 ML + Twin Shadow event |
| 9–10 | Socket Items Drops added + Selupan, Medusa, Kundun and max 100 ML |
| 11–∞ | Socket Seeds NPC, endgame endless farming, Grand Resets |
Resets are paced per season week (see the Reset System section) and the Season Pass hands out fresh objectives every week — there is a reason to log in from week one to the finale.
Season Pass
The Season Pass is an account-wide reward track shared between the main and Rift servers. It opens automatically the first time you enter the world — after that, the gold Pass button in the top-right corner of the screen brings it back anytime.
How it works
- Every week you get a fresh set of objectives — win Blood Castles, rank in Devil Square, hunt golden monsters, complete quests, reset, clear Rifts, finish special hunts.
- Completing objectives earns season points. Points never reset — they push you up through 30 reward tiers over the season.
- Every tier has a free reward (a ladder of jewels — everyone earns these just by playing) and a premium reward (upgrade jewels, keys and coin rebates).
- Claim rewards straight from the pass window. If your inventory is full, the item drops at your feet.
The premium track costs 200 MuCoins — unlock it with one click inside the pass window, or from the shop. One purchase covers your whole account for the season.
Rifts
Rifts are timed party challenge runs on the dedicated Rift server (Server 2) — pick it from the server list; your characters and account are the same everywhere. See Dungeons → Rift for the full guide and video walkthroughs.
How to enter
- Form a party of 3 or more. Every member needs a Silver Key in their inventory (consumed on entry).
- The party leader types /rift on the gathering map — the whole party is pulled into a rift instance.
Inside the rift
- Cull rifts: kill waves of monsters, then bring down the rift boss before the timer runs out.
- Survive rifts: endure until the timer ends — a single death fails the run, so play it safe.
- Monsters scale to your party's strength — a stronger party faces a harder rift. Dying too many times ejects you without a reward.
Every survivor is rewarded on a clear, and rift clears count toward your Season Pass. Rifts open in season weeks 7–8.
Remote Play
Remote Play lets you play your own game client from any browser — at work, on a laptop, even on your phone. The game keeps running on your home PC; the picture is streamed to your browser and your clicks, keys and touches are sent back to the game in real time.
How to use it
- Start the game on your home PC with Remote Play enabled.
- Log in to the website and open the Remote Play page — your personal streaming link appears there while your client is running.
- Open the link in any browser and keep playing. Touch controls work on phones.
Remote Play is available in the shop, on its own or as part of the All Inclusive bundle.
Classes
Season 6 features seven iconic classes, each with two evolutions (2nd and 3rd class change). Pick a class for an in-depth look at its playstyle, evolutions, skills and the gear it can use.
The Dark Knight is Mu's frontline warrior — a Strength-based melee bruiser built to wade into the thick of battle and stay there. He wields the widest weapon pool in the game (swords, axes, maces, spears and the heaviest two-handed blades), pairs the highest base HP and defence with brutal close-range burst, and can ride a Dark Horse at 3rd class for extra survivability and area damage.
Evolving Dark Knight → Blade Knight → Blade Master, he unlocks signature skills like Twisting Slash and Cyclone (point-blank AoE), Death Stab (a spear finisher), Rageful Blow (a heavy slam) and the famous Combo chain. In PvE he clears packs efficiently; in PvP and Castle Siege he is the durable initiator who soaks focus fire while cutting down squishier casters.
Recommended Builds
Stat points cap at 24,000 per stat (8,000 for Agility) with a 56,000 total budget. Example endgame spreads for the current balance patch:
| Build | STR | AGI | VIT | ENE | Why it works |
|---|---|---|---|---|---|
| PvP Warlord | 24,000 | 8,000 | 24,000 | 0 | Max STR feeds both the base hit and the ×7.5 skill amplifier vs players (STR÷44); max VIT gives the deepest HP pool in the game and powers Swell Life. Blade Knight also carries a small flat defence bonus (+8%). Energy stays at base. |
| PvE Farmer | 24,000 | 8,000 | 16,000 | 8,000 | Vs monsters the skill amplifier scales with ENE instead of STR, so some Energy speeds up farming and extends Swell Life duration. |
Skill Books
These scrolls, orbs and parchments teach new skills when used. Hover to preview each one.
 Orb of Death Stab
 Orb of Greater Fortitude
 Orb of Impale
 Orb of Rageful Blow
 Orb of Twisting Slash
Items
Hover an item for its stats. Use the tabs on each group to preview it as Normal, Excellent, Ancient or Socket.
Weapons (51)
Weapons drop from monsters, bosses and Boxes of Kundun. Raise their level with Jewel of Bless (+1–6) then Jewel of Soul (+7+), add the Additional Option with Jewel of Life, and make them Excellent with Jewel of Excellent — then shape their rarity tiers with the custom jewels (Divine Orb and friends). Ancient versions are set-item drops; Socket weapons drop with empty sockets you fill with Seed Spheres.
 Sword Breaker
 Flameberge
 Daybreak
 Bone Blade
 Knight Blade
 Divine Sword of Archangel
 Dark Breaker
 Sword of Destruction
 Giant Sword
 Lighting Sword
 Double Blade
 Heliacal Sword
 Legendary Sword
 Light Saber
 Sword of Salamander
 Serpent Sword
 Falchion
 Gladius
 Blade
Blade
 Sword of Assassin
 Katana
 Rapier
 Short Sword
 Kris
Kris
 Crescent Axe
 Larkan Axe
 Nikea Axe
 Battle Axe
 Tomahawk
 Double Axe
 Hand Axe
 Small Axe
 Chaos Dragon Axe
 Crystal Sword
 Crystal Morning Star
 Great Hammer
 Flail
Flail
 Morning Star
 Mace
Mace
 Brova
Brova
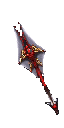
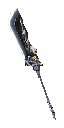 Dragon Spear
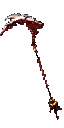 Bill of Balrog
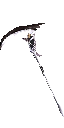 Great Scythe
 Berdysh
 Halberd
 Double Poleaxe
 Serpent Spear
 Giant Trident
 Dragon Lance
 Spear
Spear
 Light Spear
Armor (Sets) (15)
Armor drops across the world and from event boxes; wearing a full matching set grants set bonuses. Upgrade level with Bless/Soul, add defence with Jewel of Life, make it Excellent with Jewel of Excellent, and roll tiers with the custom jewels. Ancient (set) and Socket armor come from higher-end content.
 Dragon Armor
 Scale Armor
 Brave Armor
 Titan Armor
 Ashcrow Armor
 Dragon Knight Armor
 Great Dragon Armor
 Dark Phoenix Armor
 Black Dragon Armor
 Plate Armor
 Brass Armor
 Scale Armor
 Leather Armor
 Dragon Armor
 Bronze Armor
Wings (7)
Wings are crafted at the Chaos Goblin Machine in Noria. 1st-level wings use Jewel of Chaos + jewels + Blood Castle materials; 2nd and 3rd level need Jewels of Creation/Guardian plus feathers and crests. Upgrade their level with Bless/Soul and add options with Jewel of Life.
 Wings of Aerys
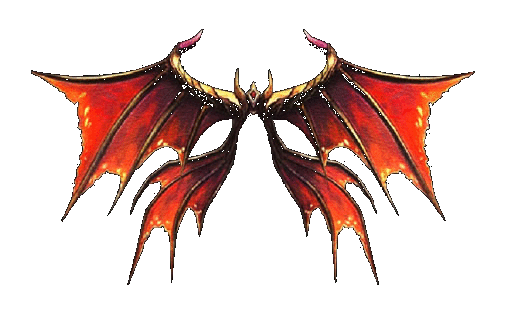 Wings of Chaos
 Wings of Conqueror
 Small Wings of Satan
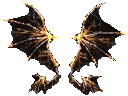 Wing of Storm
 Wings of Dragon
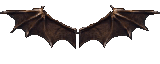 Wings of Satan
Skill Damage & Scaling
| Skill | Type | Scales with | Gross damage / hit |
|---|
A gross per-hit estimate from your stats, weapon and the skill's base damage only — before the target's defence and before excellent/critical procs, set/socket/wing/pet and Master-tree bonuses. Real in-game numbers are higher with full gear; use this to compare how skills and stat builds scale.
The Dark Wizard is the classic glass-cannon mage, governed by Energy. He trades armour and HP for the deepest spell list in the game and the highest sustained area damage, melting whole groups from range. Early on he leans on Energy Ball, Lightning and Fireball; by mid-game he unloads Meteorite, Ice Storm, Evil Spirits and the screen-clearing Nova.
Evolving Soul Master → Grand Master, he gains Hellfire, Aqua Beam and powerful master-tree boosts. He is the premier PvE farmer thanks to AoE like Evil Spirits and Nova, and a feared PvP burst dealer — fragile, but able to delete a target in a single combo if left unchecked.
Recommended Builds
Stat points cap at 24,000 per stat (8,000 for Agility) with a 56,000 total budget. Example endgame spreads for the current balance patch:
| Build | STR | AGI | VIT | ENE | Why it works |
|---|---|---|---|---|---|
| Battle Wizard | 0 | 8,000 | 24,000 | 24,000 | Max ENE for wizardry, and max VIT for a big HP pool behind Soul Barrier. VIT drives the (STR+VIT)÷384 wizardry bonus (+62%) only vs monsters — vs players the bonus is ENE÷768 instead, so Vitality no longer doubles as damage. |
| Nova Bomber | 24,000 | 8,000 | 24,000 | 0 | A one-trick burst build: full-charge Nova scales with STR×1.75 + VIT×1.75, hitting for enormous numbers — but every other spell is weak without Energy. |
Skill Books
These scrolls, orbs and parchments teach new skills when used. Hover to preview each one.
 Scroll of Wizardry Enhance
 Scroll of Nova
 Scroll of Ice Storm
 Scroll of Decay
 Scroll of Soul Barrier
 Scroll of Teleport Ally
 Scroll of Inferno
 Scroll of Cometfall
 Scroll of Aqua Beam
 Scroll of Power Wave
 Scroll of Hellfire
 Scroll of Evil Spirit
 Scroll of Twister
 Scroll of Ice
 Scroll of Teleport
 Scroll of Flame
 Scroll of Fire Ball
 Scroll of Lighting
 Scroll of Meteorite
 Scroll of Poison
Items
Hover an item for its stats. Use the tabs on each group to preview it as Normal, Excellent, Ancient or Socket.
Weapons (25)
Weapons drop from monsters, bosses and Boxes of Kundun. Raise their level with Jewel of Bless (+1–6) then Jewel of Soul (+7+), add the Additional Option with Jewel of Life, and make them Excellent with Jewel of Excellent — then shape their rarity tiers with the custom jewels (Divine Orb and friends). Ancient versions are set-item drops; Socket weapons drop with empty sockets you fill with Seed Spheres.
Blade
Short Sword
Kris
Crescent Axe
 Elven Axe
Hand Axe
Small Axe
Crystal Sword
Crystal Morning Star
Elven Axe
Hand Axe
Small Axe
Crystal Sword
Crystal Morning Star
 Chromatic Staff
 Inberial Staff
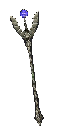 Platina Staff
 Grand Viper Staff
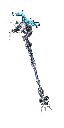 Staff of Kundun
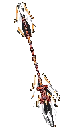 Divine Staff of Archangel
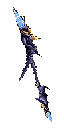 Dragon Soul Staff
 Staff of Destruction
 Chaos Lighting Staff
 Staff of Resurrection
 Legendary Staff
 Gorgon Staff
 Thunder Staff
 Serpent Staff
 Angelic Staff
 Skull Staff
Armor (Sets) (11)
Armor drops across the world and from event boxes; wearing a full matching set grants set bonuses. Upgrade level with Bless/Soul, add defence with Jewel of Life, make it Excellent with Jewel of Excellent, and roll tiers with the custom jewels. Ancient (set) and Socket armor come from higher-end content.
 Legendary Armor
 Sphinx Armor
 Hades Armor
 Eclipse Armor
 Venom Mist Armor
 Dark Soul Armor
 Grand Soul Armor
 Sphinx Armor
 Bone Armor
 Legendary Armor
 Pad Armor
Wings (6)
Wings are crafted at the Chaos Goblin Machine in Noria. 1st-level wings use Jewel of Chaos + jewels + Blood Castle materials; 2nd and 3rd level need Jewels of Creation/Guardian plus feathers and crests. Upgrade their level with Bless/Soul and add options with Jewel of Life.
Wings of Aerys
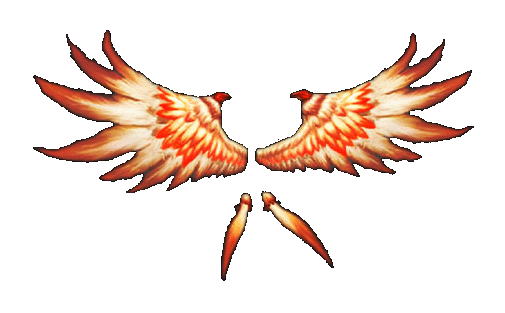 Wings of Magic
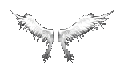 Small Wings of Heaven
 Wing of Eternal
 Wings of Soul
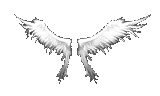 Wings of Heaven
Skill Damage & Scaling
| Skill | Type | Scales with | Gross damage / hit |
|---|
A gross per-hit estimate from your stats, weapon and the skill's base damage only — before the target's defence and before excellent/critical procs, set/socket/wing/pet and Master-tree bonuses. Real in-game numbers are higher with full gear; use this to compare how skills and stat builds scale.
The Fairy Elf is Mu's support and ranged-DPS specialist, built around Agility for attack speed and defence. With a bow or crossbow she snipes from range, and her party buffs — Greater Defense and Greater Damage — are mandatory in any serious party or siege. She can also heal allies and summon helper monsters.
Evolving Muse Elf → High Elf, she adds Multi-Shot, Triple Shot, Ice Arrow and stronger buffs. In PvE she is the glue that multiplies a party's output; in PvP she kites with high attack speed, roots targets with Ice Arrow and keeps her team alive — a force multiplier rather than a solo carry.
Recommended Builds
Stat points cap at 24,000 per stat (8,000 for Agility) with a 56,000 total budget. Example endgame spreads for the current balance patch:
| Build | STR | AGI | VIT | ENE | Why it works |
|---|---|---|---|---|---|
| Agility Sniper | 24,000 | 8,000 | 24,000 | 0 | AGI caps at 8,000, so STR becomes the biggest damage lever — the bow formula is AGI÷2 + STR÷4 at max roll, and vs players ranged skills gain a (STR+AGI)÷192 amplifier. Max VIT for survival. |
| Energy Support | 0 | 8,000 | 24,000 | 24,000 | The party queen: Greater Damage and Greater Defense scale with ENE (+1,500 to allies at cap). Low personal damage, but she wins sieges. |
Skill Books
These scrolls, orbs and parchments teach new skills when used. Hover to preview each one.
 Orb of Ice Arrow
 Orb of Penetration
 Orb of Summoning
 Orb of Greater Damage
 Orb of Greater Fortitude
 Healing Orb
Items
Hover an item for its stats. Use the tabs on each group to preview it as Normal, Excellent, Ancient or Socket.
Weapons (52)
Weapons drop from monsters, bosses and Boxes of Kundun. Raise their level with Jewel of Bless (+1–6) then Jewel of Soul (+7+), add the Additional Option with Jewel of Life, and make them Excellent with Jewel of Excellent — then shape their rarity tiers with the custom jewels (Divine Orb and friends). Ancient versions are set-item drops; Socket weapons drop with empty sockets you fill with Seed Spheres.
Lighting Sword
Double Blade
Light Saber
Gladius
Blade
Rapier
Short Sword
Kris
Nikea Axe
Battle Axe
Elven Axe
Hand Axe
Small Axe
 Frost Mace
 Elemental Mace
Crystal Sword
Crystal Morning Star
Bill of Balrog
Great Scythe
Berdysh
Halberd
Double Poleaxe
Serpent Spear
Giant Trident
Dragon Lance
Spear
Light Spear
Elemental Mace
Crystal Sword
Crystal Morning Star
Bill of Balrog
Great Scythe
Berdysh
Halberd
Double Poleaxe
Serpent Spear
Giant Trident
Dragon Lance
Spear
Light Spear
 Aileen Bowr
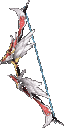 Dark Stinger
 Albatross Bow
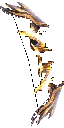 Sylph Wind Bow
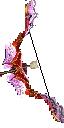 Arrow Viper Bow
 Great Reign Crossbow
 Divine Crossbow of Archangel
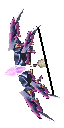 Celestial Bow
 Saint Crossbow
 Arrow
Arrow
 Aquagold Crossbow
 Bluewing Crossbow
 Serpent Crossbow
 Light Crossbow
 Arquebus
 Golden Crossbow
 Crossbow
 Bolt
Bolt
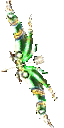 Chaos Nature Bow
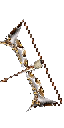 Silver Bow
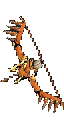 Tiger Bow
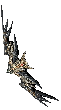 Battle Bow
 Elven Bow
 Bow
Bow
 Short Bow
Armor (Sets) (13)
Armor drops across the world and from event boxes; wearing a full matching set grants set bonuses. Upgrade level with Bless/Soul, add defence with Jewel of Life, make it Excellent with Jewel of Excellent, and roll tiers with the custom jewels. Ancient (set) and Socket armor come from higher-end content.
 Guardian Armor
 Silk Armor
 Divine Armor
 Seraphim Armor
 Iris Armor
 Sylphid Ray Armor
 Red Sprit Armor
 Divine Armor
 Guardian Armor
 Spirit Armor
 Wind Armor
 Silk Armor
 Vine Armor
Wings (7)
Wings are crafted at the Chaos Goblin Machine in Noria. 1st-level wings use Jewel of Chaos + jewels + Blood Castle materials; 2nd and 3rd level need Jewels of Creation/Guardian plus feathers and crests. Upgrade their level with Bless/Soul and add options with Jewel of Life.
Wings of Aerys
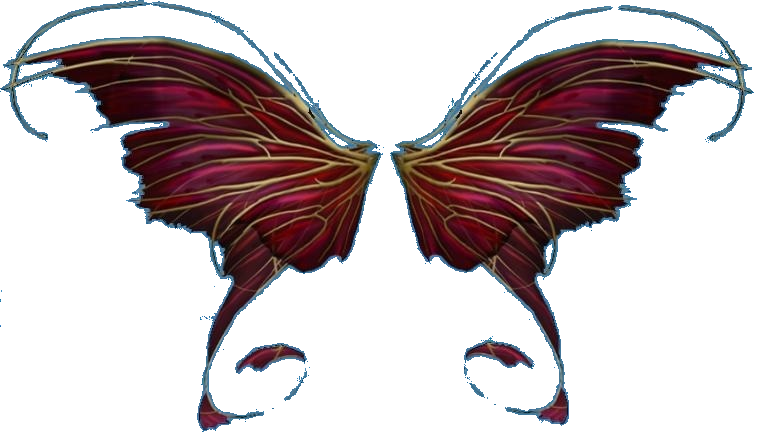 Wings of Butterfly
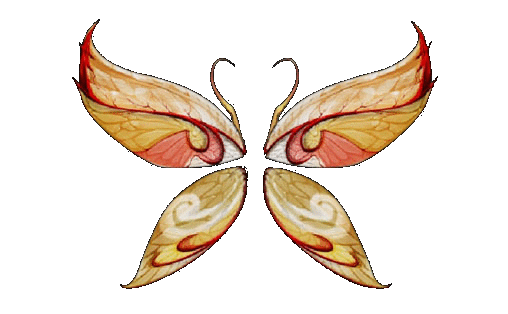 Wings of Life
 Small Wings of Elf
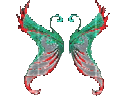 Wing of Illusion
 Wings of Spirits
 Wings of Elf
Skill Damage & Scaling
| Skill | Type | Scales with | Gross damage / hit |
|---|
A gross per-hit estimate from your stats, weapon and the skill's base damage only — before the target's defence and before excellent/critical procs, set/socket/wing/pet and Master-tree bonuses. Real in-game numbers are higher with full gear; use this to compare how skills and stat builds scale.
The Magic Gladiator is a Strength/Energy hybrid that fuses Knight and Wizard. He has no starting class quest, equips both heavy weapons and magic, and gains a free stat bonus that lets him punch above his level — which makes him a popular solo class.
The Duel Master evolution sharpens both sides — physical skills like Fire Slash and Power Slash alongside wizardry. He can build pure melee, pure caster or a hybrid and swap roles on the fly. In PvP his versatility and stat edge make him a slippery duelist; in PvE he farms comfortably with either damage type.
Recommended Builds
Stat points cap at 24,000 per stat (8,000 for Agility) with a 56,000 total budget. Example endgame spreads for the current balance patch:
| Build | STR | AGI | VIT | ENE | Why it works |
|---|---|---|---|---|---|
| Bruiser (recommended) | 24,000 | 8,000 | 16,000 | 8,000 | The PvP amplifier is (STR+ENE)÷76, so Energy is no longer mandatory — 8k ENE keeps a ×6.2 amp while 16k VIT fixes the glass jaw. |
| Glass Cannon | 24,000 | 8,000 | 8,000 | 16,000 | More ENE means a bigger base hit (ENE÷8) and a ×7.3 amp — the hardest single hits, at the cost of a thin HP pool. |
Skill Books
These scrolls, orbs and parchments teach new skills when used. Hover to preview each one.
 Orb of Fire Slash
Orb of Impale
Orb of Twisting Slash
Orb of Fire Slash
Orb of Impale
Orb of Twisting Slash
 Scroll of Gigantic Storm
Scroll of Inferno
Scroll of Cometfall
Scroll of Aqua Beam
Scroll of Power Wave
Scroll of Hellfire
Scroll of Evil Spirit
Scroll of Twister
Scroll of Ice
Scroll of Flame
Scroll of Fire Ball
Scroll of Lighting
Scroll of Meteorite
Scroll of Poison
Scroll of Gigantic Storm
Scroll of Inferno
Scroll of Cometfall
Scroll of Aqua Beam
Scroll of Power Wave
Scroll of Hellfire
Scroll of Evil Spirit
Scroll of Twister
Scroll of Ice
Scroll of Flame
Scroll of Fire Ball
Scroll of Lighting
Scroll of Meteorite
Scroll of Poison
Items
Hover an item for its stats. Use the tabs on each group to preview it as Normal, Excellent, Ancient or Socket.
Weapons (64)
Weapons drop from monsters, bosses and Boxes of Kundun. Raise their level with Jewel of Bless (+1–6) then Jewel of Soul (+7+), add the Additional Option with Jewel of Life, and make them Excellent with Jewel of Excellent — then shape their rarity tiers with the custom jewels (Divine Orb and friends). Ancient versions are set-item drops; Socket weapons drop with empty sockets you fill with Seed Spheres.
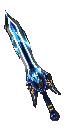 Rune Blade
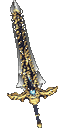 Rune Bastard Sword
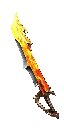 Sword Dancer
 Explosion Blade
 Dark Reign Blade
Divine Sword of Archangel
Dark Reign Blade
Divine Sword of Archangel
 Thunder Blade
Sword of Destruction
Giant Sword
Lighting Sword
Double Blade
Heliacal Sword
Legendary Sword
Light Saber
Sword of Salamander
Serpent Sword
Falchion
Gladius
Blade
Sword of Assassin
Katana
Rapier
Short Sword
Kris
Crescent Axe
Larkan Axe
Nikea Axe
Battle Axe
Elven Axe
Tomahawk
Double Axe
Hand Axe
Small Axe
Chaos Dragon Axe
Crystal Sword
Crystal Morning Star
Great Hammer
Flail
Morning Star
Mace
Brova
Bill of Balrog
Great Scythe
Berdysh
Halberd
Double Poleaxe
Serpent Spear
Giant Trident
Dragon Lance
Spear
Light Spear
Chromatic Staff
Thunder Blade
Sword of Destruction
Giant Sword
Lighting Sword
Double Blade
Heliacal Sword
Legendary Sword
Light Saber
Sword of Salamander
Serpent Sword
Falchion
Gladius
Blade
Sword of Assassin
Katana
Rapier
Short Sword
Kris
Crescent Axe
Larkan Axe
Nikea Axe
Battle Axe
Elven Axe
Tomahawk
Double Axe
Hand Axe
Small Axe
Chaos Dragon Axe
Crystal Sword
Crystal Morning Star
Great Hammer
Flail
Morning Star
Mace
Brova
Bill of Balrog
Great Scythe
Berdysh
Halberd
Double Poleaxe
Serpent Spear
Giant Trident
Dragon Lance
Spear
Light Spear
Chromatic Staff
 Deadly Staff
Staff of Kundun
Divine Staff of Archangel
Staff of Destruction
Chaos Lighting Staff
Staff of Resurrection
Legendary Staff
Gorgon Staff
Thunder Staff
Serpent Staff
Angelic Staff
Skull Staff
Deadly Staff
Staff of Kundun
Divine Staff of Archangel
Staff of Destruction
Chaos Lighting Staff
Staff of Resurrection
Legendary Staff
Gorgon Staff
Thunder Staff
Serpent Staff
Angelic Staff
Skull Staff
Armor (Sets) (22)
Armor drops across the world and from event boxes; wearing a full matching set grants set bonuses. Upgrade level with Bless/Soul, add defence with Jewel of Life, make it Excellent with Jewel of Excellent, and roll tiers with the custom jewels. Ancient (set) and Socket armor come from higher-end content.
 Atlans Armor
Legendary Armor
Dragon Armor
Sphinx Armor
Scale Armor
Atlans Armor
Legendary Armor
Dragon Armor
Sphinx Armor
Scale Armor
 Destroy Armor
 Phantom Armor
 Valiant Armor
 Volcano Armor
 Hurricane Armor
 Thunder Hawk Armor
 Storm Crow Armor
Plate Armor
Brass Armor
Sphinx Armor
Scale Armor
Leather Armor
Bone Armor
Legendary Armor
Pad Armor
Dragon Armor
Bronze Armor
Storm Crow Armor
Plate Armor
Brass Armor
Sphinx Armor
Scale Armor
Leather Armor
Bone Armor
Legendary Armor
Pad Armor
Dragon Armor
Bronze Armor
Wings (10)
Wings are crafted at the Chaos Goblin Machine in Noria. 1st-level wings use Jewel of Chaos + jewels + Blood Castle materials; 2nd and 3rd level need Jewels of Creation/Guardian plus feathers and crests. Upgrade their level with Bless/Soul and add options with Jewel of Life.
Wings of Aerys
Wings of Magic
Wings of Chaos
Wings of Conqueror
Small Wings of Satan
Small Wings of Heaven
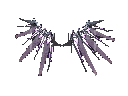 Wing of Ruin
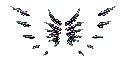 Wings of Darkness
Wings of Satan
Wings of Heaven
Wings of Darkness
Wings of Satan
Wings of Heaven
Skill Damage & Scaling
| Skill | Type | Scales with | Gross damage / hit |
|---|
A gross per-hit estimate from your stats, weapon and the skill's base damage only — before the target's defence and before excellent/critical procs, set/socket/wing/pet and Master-tree bonuses. Real in-game numbers are higher with full gear; use this to compare how skills and stat builds scale.
The Dark Lord is a commander class defined by the unique Command stat, which scales both his pet and his party's power. He rides the Dark Horse into melee and commands the Dark Raven pet to attack alongside him, while buffing allies with Critical Damage and Greater Fortitude.
The Lord Emperor evolution deepens his kit — Fire Burst, Dark Spirits, Force Wave and Earthshake (a Dark Horse AoE). He is the backbone of guild play: party buffs, summon power and strong control make him invaluable in Castle Siege, where a well-built Dark Lord amplifies an entire raid.
Recommended Builds
Stat points cap at 24,000 per stat (8,000 for Agility) with a 56,000 total budget — and the first 8,000 Command points are free, not counted against the total. Example endgame spreads for the current balance patch:
| Build | STR | AGI | VIT | ENE | CMD | Why it works |
|---|---|---|---|---|---|---|
| Lord Emperor | 24,000 | 8,000 | 12,000 | 12,000 | 8,000 | STR and ENE both feed the (STR+ENE)÷80 amplifier (×6.5 at this spread) vs players. The first 8,000 Command is free and powers the Raven, Earthshake and the Critical Damage buff. |
| Siege Commander | 16,000 | 8,000 | 12,000 | 12,000 | 16,000 | Heavier Command for pet damage, Electric Spike and party support — the raid-amplifier build for Castle Siege. |
Skill Books
These scrolls, orbs and parchments teach new skills when used. Hover to preview each one.
 Scroll of Chaotic Diseier
 Scroll of Fire Scream
 Scroll of Electric Spark
 Scroll of Critical Damage
 Scroll of Summon
 Scroll of FireBurst
Items
Hover an item for its stats. Use the tabs on each group to preview it as Normal, Excellent, Ancient or Socket.
Weapons (27)
Weapons drop from monsters, bosses and Boxes of Kundun. Raise their level with Jewel of Bless (+1–6) then Jewel of Soul (+7+), add the Additional Option with Jewel of Life, and make them Excellent with Jewel of Excellent — then shape their rarity tiers with the custom jewels (Divine Orb and friends). Ancient versions are set-item drops; Socket weapons drop with empty sockets you fill with Seed Spheres.
Divine Sword of Archangel
Serpent Sword
Falchion
Gladius
Blade
Sword of Assassin
Katana
Rapier
Short Sword
Kris
Tomahawk
Double Axe
Hand Axe
Small Axe
 Striker Scepter
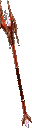 Absolute Scepter
 Shining Scepter
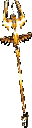 Soleil Sceptor
 Divine Scepter of Archangel
 Great Lord Scepter
 Lord Scepter
 Great Scepter
 Master Scepter
 Battle Scepter
Flail
Morning Star
Mace
Battle Scepter
Flail
Morning Star
Mace
Armor (Sets) (12)
Armor drops across the world and from event boxes; wearing a full matching set grants set bonuses. Upgrade level with Bless/Soul, add defence with Jewel of Life, make it Excellent with Jewel of Excellent, and roll tiers with the custom jewels. Ancient (set) and Socket armor come from higher-end content.
 Dark Soul Armor
Scale Armor
Dark Soul Armor
Scale Armor
 Royal Armor
 Glorious Armor
 Sunlight Armor
 Dark Master Armor
 Dark Steel Armor
 Adamantine Armor
 Light Plate Armor
Scale Armor
Leather Armor
Bronze Armor
Light Plate Armor
Scale Armor
Leather Armor
Bronze Armor
Wings (6)
Wings are crafted at the Chaos Goblin Machine in Noria. 1st-level wings use Jewel of Chaos + jewels + Blood Castle materials; 2nd and 3rd level need Jewels of Creation/Guardian plus feathers and crests. Upgrade their level with Bless/Soul and add options with Jewel of Life.
Wings of Aerys
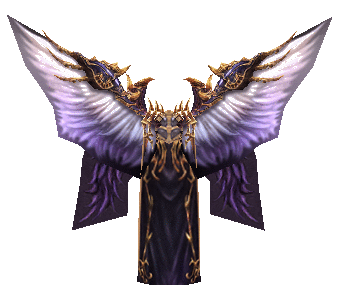 Cloak of Demon and Angel
Wings of Conqueror
Cloak of Demon and Angel
Wings of Conqueror
 Small Cape of Lord
 Cape of Emperor
 Cape of Lord
Skill Damage & Scaling
| Skill | Type | Scales with | Gross damage / hit |
|---|
A gross per-hit estimate from your stats, weapon and the skill's base damage only — before the target's defence and before excellent/critical procs, set/socket/wing/pet and Master-tree bonuses. Real in-game numbers are higher with full gear; use this to compare how skills and stat builds scale.
The Summoner is a curse-based caster (Energy) who controls fights through debuffs, life drain and summoned monsters. She weakens enemies with Sleep, Weakness and Innovation, drains their life to sustain herself, and chains magic like Lightning Shock and Drain Life.
Evolving Bloody Summoner → Dimension Master, she gains stronger curses and summons. She excels at crowd control and attrition — locking down targets in PvP and steadily grinding groups in PvE. Less bursty than the Wizard, but far harder to pin down thanks to her debuff toolkit.
Recommended Builds
Stat points cap at 24,000 per stat (8,000 for Agility) with a 56,000 total budget. Example endgame spreads for the current balance patch:
| Build | STR | AGI | VIT | ENE | Why it works |
|---|---|---|---|---|---|
| Curse Mistress | 0 | 8,000 | 24,000 | 24,000 | Max ENE for curse and magic power (both roughly doubled by a top stick); max VIT for HP and the (STR+VIT)÷768 bonus. Note: Berserker now grants half its damage bonus against players, Chain Lightning bounces need extra nearby targets in PvP, and Drain Life's self-heal is capped at 20% of the damage dealt vs players (the full Energy-scaled drain still applies vs monsters). |
Skill Books
These scrolls, orbs and parchments teach new skills when used. Hover to preview each one.
 Innovation Parchment
 Weakness Parchment
 Sleep Parchment
 Berserker Parchment
 Damage Reflection Parchment
 Lightning Shock Parchment
 Drain Life Parchment
 Chain Lightning Parchment
Scroll of Power Wave
Scroll of Ice
Scroll of Fire Ball
Scroll of Meteorite
Chain Lightning Parchment
Scroll of Power Wave
Scroll of Ice
Scroll of Fire Ball
Scroll of Meteorite
Items
Hover an item for its stats. Use the tabs on each group to preview it as Normal, Excellent, Ancient or Socket.
Weapons (19)
Weapons drop from monsters, bosses and Boxes of Kundun. Raise their level with Jewel of Bless (+1–6) then Jewel of Soul (+7+), add the Additional Option with Jewel of Life, and make them Excellent with Jewel of Excellent — then shape their rarity tiers with the custom jewels (Divine Orb and friends). Ancient versions are set-item drops; Socket weapons drop with empty sockets you fill with Seed Spheres.
Rapier
Short Sword
Kris
Elven Axe
Hand Axe
Small Axe
 Divine Stick of the Archangel
 Raven Stick
 Book of Lagle
 Book of Neil
 Book of Samut
 Eternal Wing Stick
 Storm Blitz Stick
 Demonic Stick
 Ancient Stick
 Red Wing Stick
 Violent Wind Stick
 Mystery Stick
Skull Staff
Mystery Stick
Skull Staff
Armor (Sets) (8)
Armor drops across the world and from event boxes; wearing a full matching set grants set bonuses. Upgrade level with Bless/Soul, add defence with Jewel of Life, make it Excellent with Jewel of Excellent, and roll tiers with the custom jewels. Ancient (set) and Socket armor come from higher-end content.
 Red Wing Armor
 Violent Wind Armor
 Eternal Wing Armor
 Storm Blitz Armor
 Demonic Armor
 Ancient Armor
 Red Wing Armor
 Violent Wind Armor
Wings (7)
Wings are crafted at the Chaos Goblin Machine in Noria. 1st-level wings use Jewel of Chaos + jewels + Blood Castle materials; 2nd and 3rd level need Jewels of Creation/Guardian plus feathers and crests. Upgrade their level with Bless/Soul and add options with Jewel of Life.
Wings of Aerys
Wings of Butterfly
Wings of Life
 Small Wing of Curse
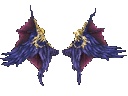 Wing of Dimension
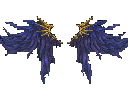 Wind of Despair
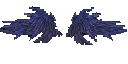 Wing of Curse
Skill Damage & Scaling
| Skill | Type | Scales with | Gross damage / hit |
|---|
A gross per-hit estimate from your stats, weapon and the skill's base damage only — before the target's defence and before excellent/critical procs, set/socket/wing/pet and Master-tree bonuses. Real in-game numbers are higher with full gear; use this to compare how skills and stat builds scale.
The Rage Fighter (added in Season 6) is a Strength/Vitality martial artist who fights with fists and gloves at close range. He chains physical strikes and kicks into combos, buffs the party with Increase Health and Increase SD, and is exceptionally tanky for a DPS class.
The Fist Master evolution unlocks Dragon Lore, Killing Blow, Beast Uppercut and the mobile Chain Drive. In PvP he is a brutal, mobile bruiser who closes gaps and bursts targets; in PvE his combos and party SD buff make him a sturdy, self-sufficient fighter.
Recommended Builds
Stat points cap at 24,000 per stat (8,000 for Agility) with a 56,000 total budget. Example endgame spreads for the current balance patch:
| Build | STR | AGI | VIT | ENE | Why it works |
|---|---|---|---|---|---|
| Juggernaut | 24,000 | 8,000 | 24,000 | 0 | VIT does double duty — raw fist damage (VIT÷12) and a huge HP pool — while STR fills the rest of the base hit. Vs players the barrages land 3 hits at a flat ×2 plus a small VIT bonus (VIT÷512) per hit (4 hits vs monsters). |
| Dragon Kit (siege) | 24,000 | 8,000 | 16,000 | 8,000 | Some Energy feeds the Dark Side / Dragon Roar amplifier ((VIT+ENE)÷384 vs players) for the ranged kit that shines at Castle Siege. |
Skill Books
These scrolls, orbs and parchments teach new skills when used. Hover to preview each one.
 Increase Block Parchment
 Increase Health Parchment
 Ignore Defense Parchment
 Dragon Slasher Parchment
 Dragon Roar Parchment
 Dark Side Parchment
 Chain Drive Parchment
Items
Hover an item for its stats. Use the tabs on each group to preview it as Normal, Excellent, Ancient or Socket.
Weapons (15)
Weapons drop from monsters, bosses and Boxes of Kundun. Raise their level with Jewel of Bless (+1–6) then Jewel of Soul (+7+), add the Additional Option with Jewel of Life, and make them Excellent with Jewel of Excellent — then shape their rarity tiers with the custom jewels (Divine Orb and friends). Ancient versions are set-item drops; Socket weapons drop with empty sockets you fill with Seed Spheres.
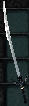 Phoenix Soul Star
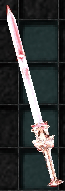 Crimson Skull Glove
 Piercing Blade Glove
 Holy Storm Claw
 Sacred Glove
Short Sword
Kris
Tomahawk
Hand Axe
Small Axe
Crystal Morning Star
Great Hammer
Flail
Morning Star
Mace
Sacred Glove
Short Sword
Kris
Tomahawk
Hand Axe
Small Axe
Crystal Morning Star
Great Hammer
Flail
Morning Star
Mace
Armor (Sets) (10)
Armor drops across the world and from event boxes; wearing a full matching set grants set bonuses. Upgrade level with Bless/Soul, add defence with Jewel of Life, make it Excellent with Jewel of Excellent, and roll tiers with the custom jewels. Ancient (set) and Socket armor come from higher-end content.
 Phoenix Soul Armor
 Storm Jahad Armor
Scale Armor
Storm Jahad Armor
Scale Armor
 Piercing Groove Armor
 Storm Jahad Armor
 Sacred Fire Armor
Plate Armor
Brass Armor
Scale Armor
Leather Armor
Sacred Fire Armor
Plate Armor
Brass Armor
Scale Armor
Leather Armor
Wings (5)
Wings are crafted at the Chaos Goblin Machine in Noria. 1st-level wings use Jewel of Chaos + jewels + Blood Castle materials; 2nd and 3rd level need Jewels of Creation/Guardian plus feathers and crests. Upgrade their level with Bless/Soul and add options with Jewel of Life.
Wings of Aerys
Cloak of Demon and Angel
 Little Warrior's Cloak
 Cape of Overrule
 Cape of Fighter
Skill Damage & Scaling
| Skill | Type | Scales with | Gross damage / hit |
|---|
A gross per-hit estimate from your stats, weapon and the skill's base damage only — before the target's defence and before excellent/critical procs, set/socket/wing/pet and Master-tree bonuses. Real in-game numbers are higher with full gear; use this to compare how skills and stat builds scale.
Reach the 3rd class change (around level 380) to unlock your final evolution, a new wing tier and exclusive skills.
Leveling & Progression
Hunt monsters to gain experience, then add stat points to Strength, Agility, Vitality, Energy (and Command for the Dark Lord). Party with a Fairy Elf for buffs and a Dark Wizard for area damage to level several times faster.
After your 3rd class change you enter the Master Level system: every point goes into a class-specific Master Skill Tree, upgrading damage, defence and buffs and unlocking signature ultimate skills.
Maps progress in difficulty and reward: Lorencia → Noria → Devias → Dungeon → Lost Tower → Atlans → Tarkan → Aida → Icarus → Kalima → Kanturu → Crywolf → Land of Trials → Raklion → Swamp of Calmness → Vulcanus → Karutan.
PgQuest — Persistent Progression System
PgQuest is a custom, account-wide progression loop that runs alongside normal gameplay and never ends. Each completed quest permanently improves your character in PvP through unique combat bonuses you cannot get from gear alone.
The cycle is straightforward: you are assigned a Kill Quest — hunt a set number of a specific monster invading a map near your level range. An on-screen alert announces the monster and which maps it is invading. Kill the required count and the quest completes, earning you one bonus point added to a randomly chosen combat stat and a reward item drawn from your personal reward pool. Your character then enters a rest stage (Gate Quest) for a cooldown period before the next hunt begins. The loop repeats indefinitely: hunt → earn → rest → hunt.
Because points land in random stats, use /quest movepoints <from> <to> <count> (costs WCoinP per point) to respec them into the build you want. Skip the rest stage early with /quest bypass (WCoinP), check your current quest progress with /quest status, and learn about any bonus with /quest bonus.
PgQuest Combat Bonuses
All bonuses primarily apply in player-vs-player combat. Stack as many points as you can into your build, then use movepoints to fine-tune it.
- Berserk — Increases the damage you deal at the cost of slightly increased damage taken. A powerful trade-off for aggressive builds; the damage gain outweighs the penalty.
- Ignore Pain — Gives you a chance to shrug off a chunk of incoming damage on any hit, improving survival and sustain.
- Reflect Reduction — Reduces the damage you take from damage-reflect effects, letting you attack reflect-heavy enemies without hurting yourself.
- Armour Dent — Gives your attacks a chance to bypass the enemy’s Ignore Pain entirely so your hit lands in full. The direct counter to defensive builds in PvP.
- Lucky Critical — Re-rolls your critical hit chance on each attack and keeps the better result, effectively raising how often you land critical strikes.
- Lucky ExDamage — Same mechanic as Lucky Critical but for Excellent Damage — re-rolls and keeps the higher result, boosting your excellent-hit frequency.
- Life Steal — Drains HP from the enemy on hit and heals you for that amount, providing sustain over extended fights.
- Mana Steal — Drains Mana from the enemy on hit and refills yours, keeping your skills firing while starving theirs.
- SD Steal — Steals Shield (SD) from the enemy and adds it to your own on hit, stripping their PvP damage buffer while replenishing yours.
- AG Steal — Steals AG (ability gauge) from the enemy on hit and refills yours, keeping your special abilities fuelled while denying theirs.
Guilds and Castle Siege
Form or join a guild, build alliances and fight rivals across contested maps. The pinnacle is Castle Siege — a weekly war where guilds battle to conquer and defend the Valley of Loren castle for server-wide prestige and exclusive rewards.
Settle scores in the arena, dominate Chaos Castle, and prove your build in the Gens family war between Duprian and Vanert.
Dungeons
Timed and instanced dungeons are the fastest way to earn experience, jewels and rare loot. Check the event times for schedules.
| Dungeon | What it's for |
|---|---|
| Blood Castle | Rescue the Archangel against the clock — top source of jewels and wing materials. |
| Devil Square | Survive monster waves across timed rounds for huge EXP and zen. |
| Chaos Castle | Last-player-standing battle royale — push rivals off and loot survivors. |
| Illusion Temple | Team vs team capture event with skills disabled — pure tactics. |
| Doppelgänger / Loren Deep | Themed dungeon with elite mobs and rich box drops. |
| Imperial Guardian | Multi-stage Kanturu-style raid for ancient items and high EXP. |
Rift
The Rift is a timed, instanced party challenge hosted on its own Rift server (Server 2 in the server list). Your account and characters are shared across every server, so you jump in with the same character you already play.
How to enter
- Log in on Server 2 — the dedicated Rift server — from the server list.
- Gather a party of 3 or more players.
- Every member must carry a Silver Key: one key per player is spent when the rift opens.
- The party leader types /rift on the gathering map and the whole party is pulled into a fresh rift instance. You get a short buff window to prepare before the monsters arrive.
Two rift modes
Each run is randomly one of two modes:
- Hunt — monsters spawn in packs across the map; clear one spot and the fight moves on to the next. Slay enough of them and a boss appears — bring it down before the timer runs out to clear the rift. If you die you respawn where you fell, but dying too many times ejects you with no reward.
- Survive — you hold a single position while monsters and bosses respawn endlessly. There is nothing to fully clear: just stay alive until the timer ends. Here a single member's death fails the run for the whole party, so play it safe and keep each other healed.
Rift monsters scale to your party's strongest member, and extra bodies only make them tankier — the Rift stays a real challenge no matter how geared you are. Every survivor is rewarded on a clear, and clears count toward your Season Pass.
Video guides
VIP Map
Purchase VIP Map access from the store to unlock two premium maps: Acheron and Debenter. Both maps are full of top-tier spots.
PK and takeover are disabled in VIP maps. All players cooperate there, with the party password set automatically to partypls.
Lorencia

Noria

Devias

Dungeon 1

Dungeon 2

Dungeon 3

LostTower 1

LostTower 2

LostTower 3

LostTower 4

LostTower 5

LostTower 6

LostTower 7

Atlans

Tarkan

Icarus

Aida

Karutan 1

Karutan 2

Crywolf

Kanturu Relics

Kanturu

Land of Trials

LaCleon
LaCleon monsters drop socketed non-excellent items.

Vulcanus

Golden Invasion
Golden Invasion starts every 2 hours at a random time. Golden monsters not listed here drop WCoin and Goblin Points when killed.
Golden Budge Dragon
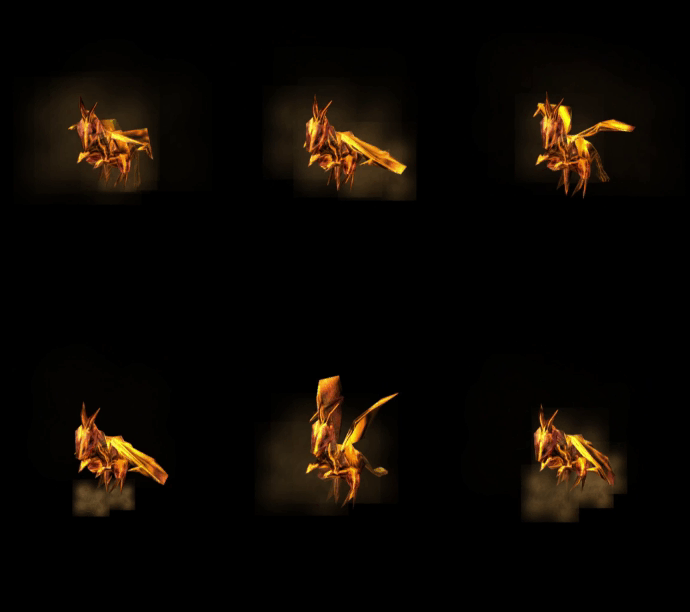

Golden Goblin
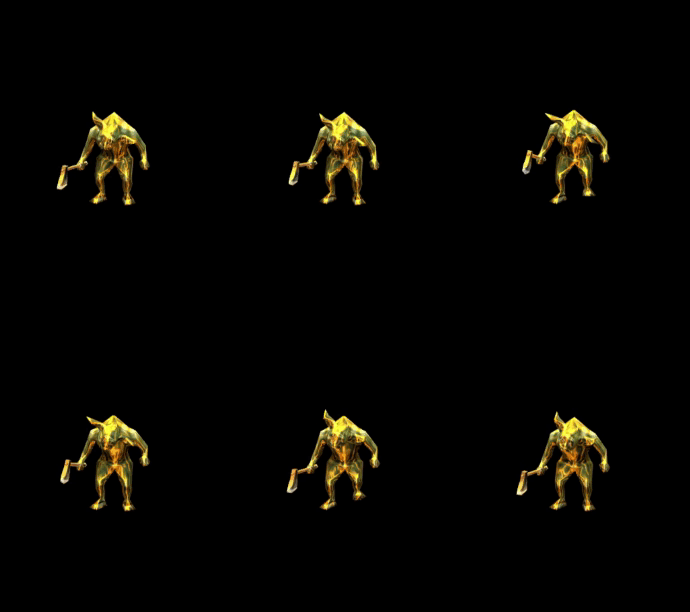
Golden Rabbit
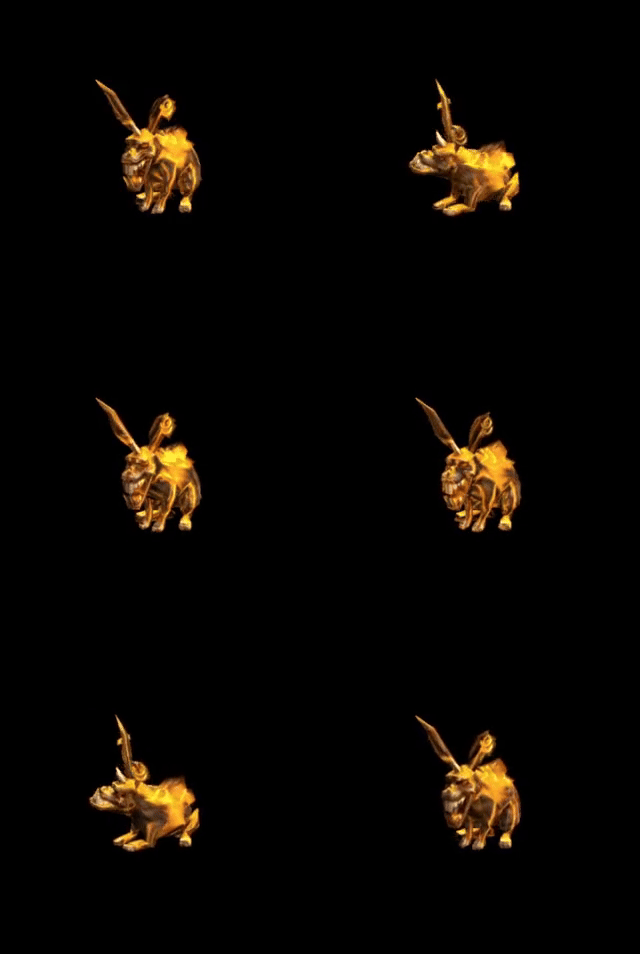
Golden Dragon
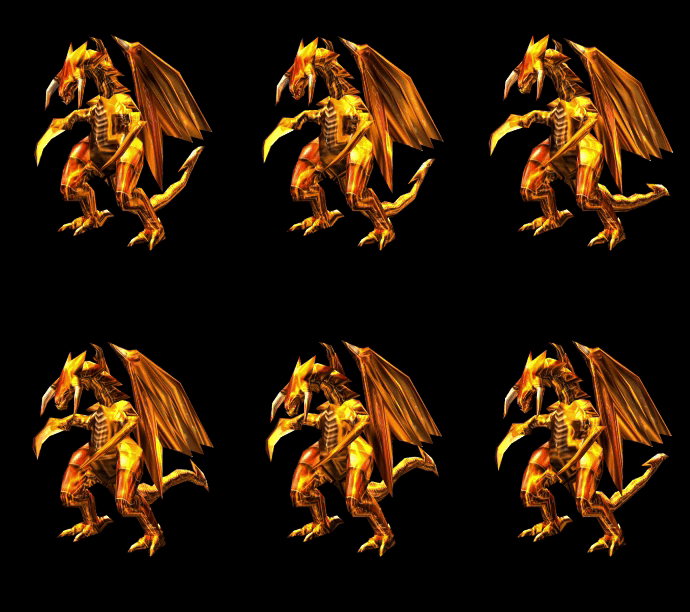

Golden Stone Golem
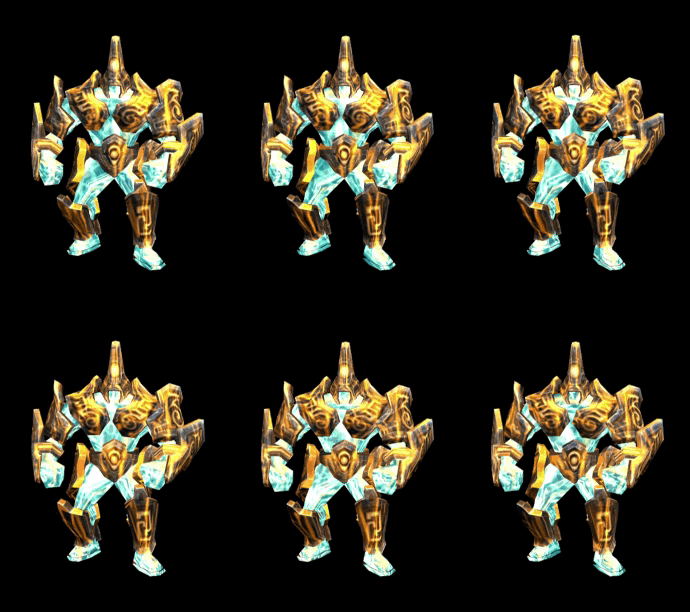
Golden Crust
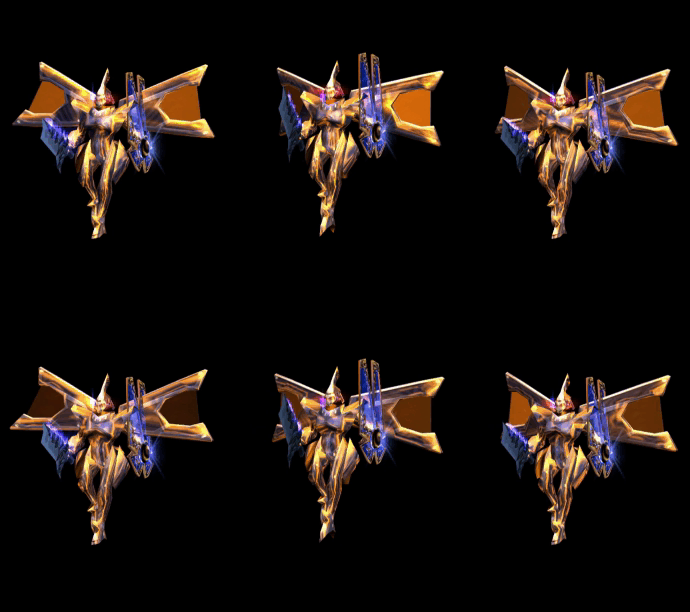
Golden Satyros
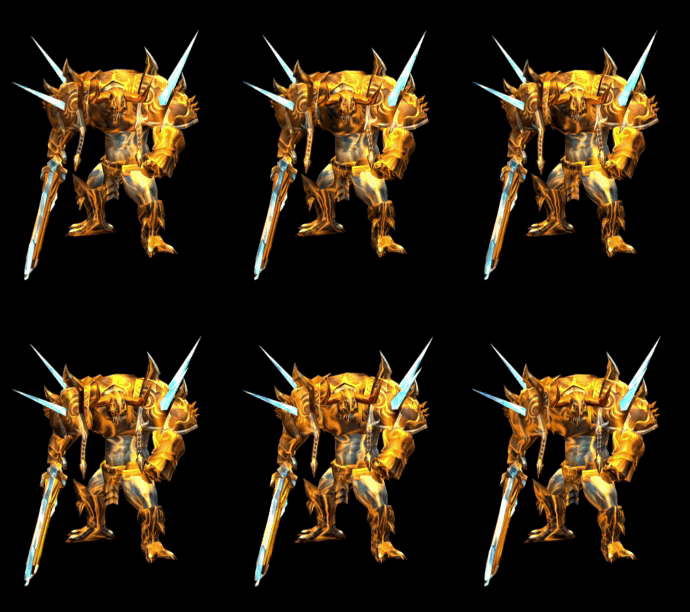

Golden Lizard King
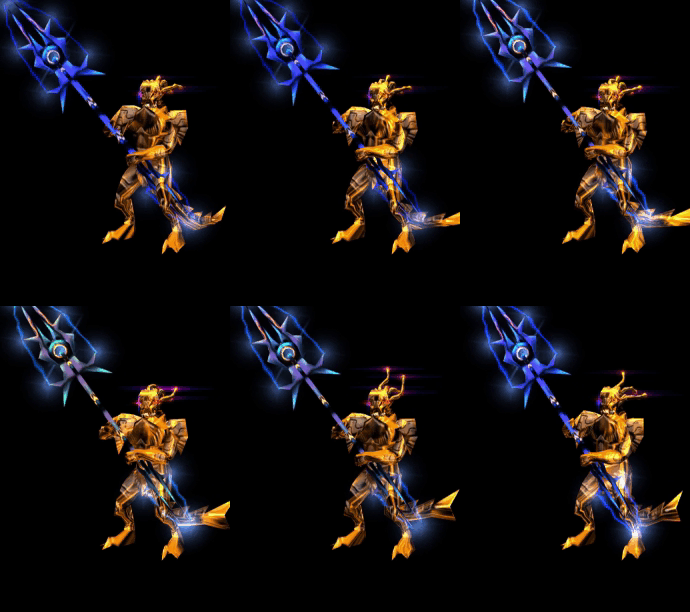
Great Golden Dragon
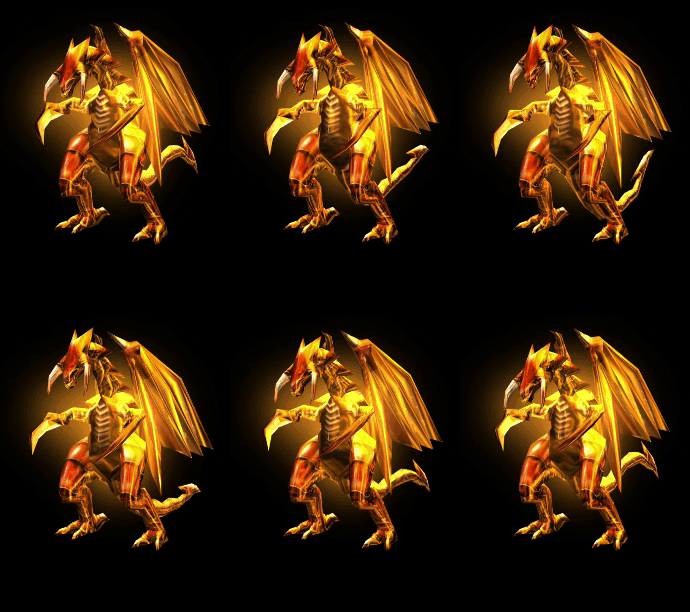
Golden Tantallos
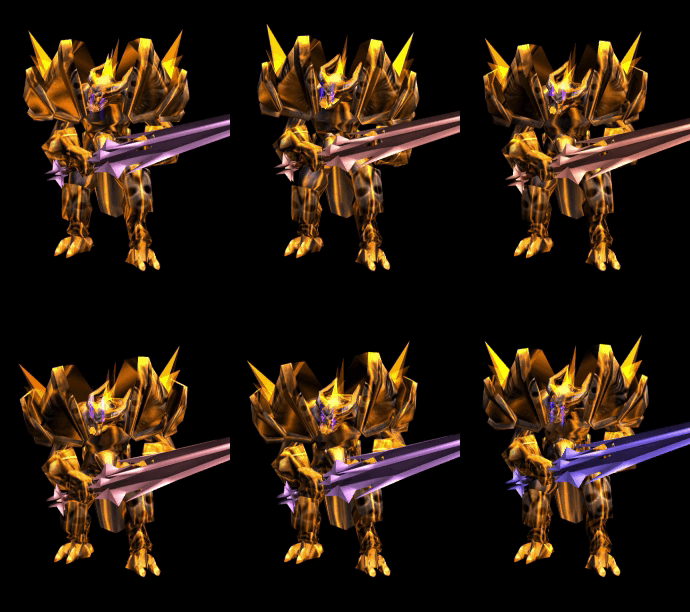

Kundun
Location: Kalima 7 - the deepest level of the Kalima dungeon. Reach it by completing Kalima 1-6, fighting through waves of undead monsters and mini-bosses, each dropping Ancient items as you descend.
Drops: Rewards are previewed below as Excellent +13 items with all six Excellent options. Actual drops are +0 items with Skill, Luck, Additional Option and 1-3 random Excellent options.
Weapons & Shields
Excellent FlamebergeExcellent Sword BreakerExcellent Rune Bastard SwordExcellent Crimson Skull GloveExcellent Frost MaceExcellent Absolute ScepterExcellent Dark StingerExcellent Eternal Wing StickExcellent Deadly StaffExcellent Inberial Staff Excellent Crimson Glory
 Excellent Salamander Shield
 Excellent Frost Barrier
 Excellent Guardian Shield
 Armor Sets
Only the armor icon is shown for each set. Kundun can also drop the matching pieces listed under the name.
Excellent Eternal Wing ArmorAlso: helm, pants, gloves and boots Excellent Titan ArmorAlso: helm, pants, gloves and boots Excellent Brave ArmorAlso: helm, pants, gloves and boots Excellent Phantom ArmorAlso: pants, gloves and boots Excellent Destroy ArmorAlso: pants, gloves and boots Excellent Seraphim ArmorAlso: helm, pants, gloves and boots Excellent Divine ArmorAlso: helm, pants, gloves and boots Excellent Royal ArmorAlso: helm, pants, gloves and boots Excellent Hades ArmorAlso: helm, pants, gloves and boots  Excellent Tigris ArmorAlso: helm, pants and boots
 Erohim
Location: Castle Hunt Zone — accessible during Castle Siege events.
Drops: Excellent endgame weapons, rings and pendants.
Dark Elf & Balgass
Location: Crywolf Fortress - spawns during the Crywolf event after all 12 Dark Elves are defeated.
Dark Elf Drops
Dark Elf rewards are non-excellent items. They drop at +0 with their configured Skill, Luck and Additional Option settings.
Weapons
Bone BladeExplosion BladeSoleil SceptorSylph Wind BowGrand Viper StaffStorm Blitz StickPhoenix Soul Star Armor Sets
Only the armor icon is shown for each set. Dark Elf can also drop the matching pieces listed under the name.
Dragon Knight ArmorAlso: helm, pants, gloves, boots Venom Mist ArmorAlso: helm, pants, gloves, boots Sylphid Ray ArmorAlso: helm, pants, gloves, boots Sunlight ArmorAlso: helm, pants, gloves, boots Volcano ArmorAlso: pants, gloves, boots Storm Blitz ArmorAlso: helm, pants, gloves, boots Phoenix Soul ArmorAlso: helm, pants, boots Jewels
Jewel Of LuckJewel Of SkillJewel Of Curse Balgass Drops
Balgass equipment rewards are previewed below as Excellent +13 items with all six Excellent options. Actual equipment drops are +0 items with Skill, Luck, Additional Option and 1-3 random Excellent options. Special items are shown as normal item drops.
Weapons
Excellent Knight BladeExcellent Dark Reign BladeExcellent Great Lord ScepterExcellent Staff of KundunExcellent Arrow Viper BowExcellent Piercing Blade GloveExcellent Demonic Stick Armor Sets
Only the armor icon is shown for each set. Balgass can also drop the matching pieces listed under the name.
Excellent Demonic ArmorAlso: helm, pants, gloves, boots Excellent Piercing Groove ArmorAlso: helm, pants, boots Excellent Great Dragon ArmorAlso: helm, pants, gloves, boots Excellent Dark Soul ArmorAlso: helm, pants, gloves, boots Excellent Red Sprit ArmorAlso: helm, pants, gloves, boots Excellent Dark Master ArmorAlso: helm, pants, gloves, boots Excellent Hurricane ArmorAlso: pants, gloves, boots Special Items
Gold KeySinestro's CurseTheli's ReturnShadow of AtlasJewel Of ExcellentJewel Of Nature Maya's Hands
Location: Kanturu Relics — the first boss encounter of the Kanturu event. Three waves of Maya's Hands must be defeated in sequence to progress to Nightmare.
Drops: Rewards are previewed below as Excellent +13 items with all six Excellent options. Actual drops are +0 items with one random Excellent option (weapons also roll Skill and Luck; set pieces roll Luck).
Weapons
Excellent Knight BladeExcellent Dark Reign BladeExcellent Great Lord ScepterExcellent Staff of KundunExcellent Arrow Viper BowExcellent Piercing Blade GloveExcellent Demonic Stick Armor Sets
Only the armor icon is shown for each set. Maya's Hands can also drop the matching pieces listed under the name.
Excellent Great Dragon ArmorAlso: helm, pants, gloves and boots Excellent Dark Soul ArmorAlso: helm, pants, gloves and boots Excellent Red Sprit ArmorAlso: helm, pants, gloves and boots Excellent Dark Master ArmorAlso: helm, pants, gloves and boots Excellent Hurricane ArmorAlso: pants, gloves and boots Excellent Piercing Groove ArmorAlso: helm, pants and boots Excellent Demonic ArmorAlso: helm, pants, gloves and boots Nightmare
Location: Kanturu Boss Arena — unlocked after defeating Maya's Hands. Nightmare summons waves of monsters three times during the fight and must be killed within 20 minutes.
Drops: Every Ring and Pendant in the game. Each drops at +0 with a single random Excellent option.
Rings
 Ring of Ice
 Ring of Poison
 Ring of Fire
 Ring of Earth
 Ring of Wind
 Ring of Magic
 Pendants
 Pendant of Lighting
 Pendant of Fire
 Pendant of Ice
 Pendant of Wind
 Pendant of Water
 Pendant of Ability
 Selupan
Location: Raklion - Lair of Selupan. One of the most demanding boss fights on the server, requiring a well-coordinated group.
Drops: Selupan can drop 3-5 items. Rewards are previewed below as Excellent +13 items with all six Excellent options. Actual drops are +0 items with Skill, Luck, Additional Option and 1-3 random Excellent options.
Weapons & Shields
Excellent Piercing Blade GloveExcellent Dark BreakerExcellent Knight BladeExcellent Dark Reign BladeExcellent Great Lord ScepterExcellent Striker ScepterExcellent Dragon SpearExcellent BrovaExcellent Great Reign CrossbowExcellent Arrow Viper BowExcellent Aileen BowrExcellent Staff of KundunExcellent Demonic StickExcellent Chromatic StaffExcellent Raven StickExcellent Book of Lagle Excellent Cross ShieldExcellent FlamebergeExcellent Sword BreakerExcellent Rune Bastard SwordExcellent Crimson Skull GloveExcellent Frost MaceExcellent Absolute ScepterExcellent Dark StingerExcellent Eternal Wing StickExcellent Deadly StaffExcellent Inberial StaffExcellent Crimson GloryExcellent Salamander ShieldExcellent Frost BarrierExcellent Guardian ShieldExcellent Bone BladeExcellent Explosion BladeExcellent Soleil SceptorExcellent Sylph Wind BowExcellent Grand Viper StaffExcellent Storm Blitz StickExcellent Phoenix Soul Star
 Armor Sets
Only the armor icon is shown for each set. Selupan can also drop the matching pieces listed under the name.
Excellent Dark Phoenix ArmorAlso: helm, pants, gloves and boots Excellent Great Dragon ArmorAlso: helm, pants, gloves and boots Excellent Dark Soul ArmorAlso: helm, pants, gloves and boots Excellent Hurricane ArmorAlso: pants, gloves and boots Excellent Red Sprit ArmorAlso: helm, pants, gloves and boots Excellent Dark Master ArmorAlso: helm, pants, gloves and boots Excellent Demonic ArmorAlso: helm, pants, gloves and boots Excellent Piercing Groove ArmorAlso: helm, pants and boots Excellent Eternal Wing ArmorAlso: helm, pants, gloves and boots Excellent Titan ArmorAlso: helm, pants, gloves and boots Excellent Brave ArmorAlso: helm, pants, gloves and boots Excellent Phantom ArmorAlso: pants, gloves and boots Excellent Destroy ArmorAlso: pants, gloves and boots Excellent Seraphim ArmorAlso: helm, pants, gloves and boots Excellent Divine ArmorAlso: helm, pants, gloves and boots Excellent Royal ArmorAlso: helm, pants, gloves and boots Excellent Hades ArmorAlso: helm, pants, gloves and boots Excellent Tigris ArmorAlso: helm, pants and boots Medusa
Location: Swamp of Calmness.
Drops: Medusa drops jewels and high-tier equipment. Equipment rewards are previewed below as Excellent +13 items with all six Excellent options. Actual equipment drops are +0 items with Skill, Luck, Additional Option and 1-3 random Excellent options.
Jewels & Materials
 bundle of Jewel of Bless
 budle of Jewel of Soulbundle of Jewel of Blessbudle of Jewel of SoulJewel of BlessJewel of Soul
 Jewel of Life
 Jewel of Creation
 Jewel of HarmonyJewel of Chaos
 Weapons & Shields
Excellent Dark BreakerExcellent Thunder BladeExcellent Rune BladeExcellent Knight BladeExcellent Dark Reign BladeExcellent Great Lord ScepterExcellent Great Reign CrossbowExcellent Arrow Viper BowExcellent Dragon Soul StaffExcellent Staff of KundunExcellent Demonic StickExcellent Crimson Skull GloveExcellent FlamebergeExcellent Sword BreakerExcellent Rune Bastard SwordExcellent Frost MaceExcellent Absolute ScepterExcellent Dark StingerExcellent Deadly StaffExcellent Inberial Staff Excellent Merlin StickExcellent Crimson GloryExcellent Salamander ShieldExcellent Frost BarrierExcellent Guardian Shield
 Armor Sets
Only the armor icon is shown for each set. Medusa can also drop the matching pieces listed under the name.
Excellent Titan ArmorAlso: helm, pants, gloves and boots Excellent Brave ArmorAlso: helm, pants, gloves and boots Excellent Phantom ArmorAlso: pants, gloves and boots Excellent Destroy ArmorAlso: pants, gloves and boots Excellent Seraphim ArmorAlso: helm, pants, gloves and boots Excellent Divine ArmorAlso: helm, pants, gloves and boots Excellent Royal ArmorAlso: helm, pants, gloves and boots Excellent Hades ArmorAlso: helm, pants, gloves and boots Excellent Tigris ArmorAlso: helm, pants and boots Ancient Set Pieces
 Excellent Garuda Brass Boots
 Excellent Garuda Brass Gloves
 Excellent Garuda Brass PantsExcellent Garuda Brass Armor
 Excellent Ancient Spirit Helm
 Excellent Ancient Legendary Boots
 Excellent Ancient Legendary Pants
 Excellent Hera Sphinx PantsExcellent Hera Sphinx Armor
 Excellent Hera Sphinx Mask
 Excellent Odin Wind Boots
 Excellent Odin Wind Gloves
 Excellent Odin Wind PantsExcellent Odin Wind Armor
 Excellent Odin Wind Helm
 Vulcanus
Location: Vulcanus.
Drops: Weapons, armor sets, a Jewel of Chaos, and pet items: Guardian Angel, Imp, Horn of Uniria and Horn of Dinorant.
Imperial Guardian
Location: Imperial Guardian event — the Sunday finale boss, accessible only after collecting all six Secromicon Fragments from the weekday maps.
Drops: Jewels of Bless, Soul, Life, Creation and Chaos, plus the rare Jewel of Guardian — required for crafting 3rd-level wings — and bonus Zen.
Wings & Armor & Weapons
Wings are the most important upgrade in Mu Online — they massively boost damage and defence, and every class has its own line. They progress through tiers: 1st Level Wings, 2nd Level Wings & capes, the custom Wings Lvl 2.5, and the prestigious 3rd Level Wings. All are crafted at the Chaos Goblin Machine in Noria. Hover any wing to see its in-game tooltip; the class that can wear it is shown under each icon.
Armor & weapons roll powerful stacking options (level, additional, excellent, ancient, sockets). Class-restricted 380 and Set items define endgame builds — browse the marketplace to complete yours.
Pets: Dark Horse and Dark Raven (Dark Lord), plus Demon, Spirit of Guardian, Fenrir and the leveling pets Panda and Pet Unicorn.
1st Level Wings
The first wings your character can wear (from character level 180). Crafted at the Chaos Goblin Machine: combine a Chaos weapon (Chaos Dragon Axe, Chaos Nature Bow or Chaos Lightning Staff) with a Jewel of Chaos, a Jewel of Bless, a Jewel of Soul and an excellent item. A success gives a random 1st Level Wing — the more valuable the ingredients, the higher the chance.
Wings of ElfFairy ElfWings of HeavenDark WizardWings of SatanDark KnightWing of CurseSummoner 2nd Level Wings & Capes
A large jump in defence and damage. Combine a 1st Level Wing + a Loch's Feather + a Jewel of Chaos + an excellent item (+4 or higher) in the Chaos Machine for a random 2nd Level Wing. The Cape of Lord (Dark Lord) and Cape of Fighter (Rage Fighter) are the 2nd-tier capes — the Cape of Lord uses a Sleeve of Lord in place of the Loch's Feather.
Wings of SpiritsFairy ElfWings of SoulDark WizardWings of DragonDark KnightWings of DarknessMagic GladiatorWind of DespairSummonerCape of LordDark LordCape of FighterRage Fighter Wings Lvl 2.5
Wings Lvl 2.5 are exclusive custom wings crafted at the Chaos Goblin Machine. They sit between 2nd and 3rd level wings in power and come in seven variants — a successful combine gives you one at random.
| Ingredient | Requirement |
|---|---|
| 2nd Level Wing / Cape | Wings of Soul, Spirit, Dragon or Darkness, Wings of Despair, Cape of Fighter or Cape of Lord — at +9 with an additional option of at least +4 |
| Bundle of Jewel of Soul | 1 × (+0) |
| Bundle of Jewel of Bless | 1 × (+0) |
| Bundle of Jewel of Creation | 1 × (+0) |
| Bundle of Jewel of Chaos | 1 × (+0) |
| Zen | 500,000,000 |
Success rate: 50%. On success you receive one random Wings Lvl 2.5 — and each crafted wing has a 50% chance to roll a single excellent option (or none, at the same rate as other wing crafts). On failure the ingredients are consumed.
Excellent options
A crafted Wings Lvl 2.5 has a 50% chance to roll one of these excellent options (the level-2 wing set, with bigger values):
- Increased Health +75
- Increased Mana +75
- Ignore opponent's defensive power +4%
- Increase Max AG +75
Level +11 to +15 bonus options
Once a Wings Lvl 2.5 carries an excellent option and is upgraded to +11 or higher, it gains a bonus set that grows with its level:
| Wing Level | Increase Maximum Life | Increase Damage | Additional PvP Damage |
|---|---|---|---|
| +11 / +12 | +500 | +1% | +200 |
| +13 / +14 | +1000 | +2% | +250 |
| +15 | +1500 | +3% | +350 |
Possible results (shown at +13 with all excellent options)
Wings of ConquerorWings of ChaosWings of MagicWings of LifeWings of ButterflyCloak of Demon and AngelWings of Aerys 3rd Level Wings & Capes
The prestige endgame wings. Combine a 2nd Level Wing at +9 with an additional option + a Jewel of Chaos + a Bundle of Jewel of Soul + a Jewel of Creation + an item in the Chaos Machine. A success yields a random 3rd Level Wing / Cape for your class.
Wing of Eternal +DestroyFairy ElfWing of IllusionDark WizardWing of StormDark KnightWing of RuinMagic GladiatorWing of DimensionSummonerCape of EmperorDark LordCape of OverruleRage Fighter Blood Castle
Rewards
– The completing player earns a jewel based on the Blood Castle level entered: a Jewel of Bless at Blood Castle 1, and a  Jewel of Luck at Blood Castle 2 through 7. All surviving participants also receive a substantial experience bonus — breaking the Crystal Gate, destroying Guardian Statues, and returning the Archangel’s weapon each count toward your score.
Risk your life to save the Archangel
One of the strongest warriors in the Continent of MU, the Archangel; has secretly been laying watch over the lands that he has sworn to protect. As Kundun’s presence approaches, the Archangel has been warding off all the monsters trying to invade the Continent of MU. But alas, our Guardian Archangel can not fend on his own forever.
Kundun’s Army has invaded his Castle and has overcome the strength of the Archangel. The Archangel, Injured and in peril; summons forth the warriors of MU, to come aid him in his most dire time of need. Unable to summon his strengths without his Divine Weapon of Archangel, you have been asked to infiltrate this now over ridden Castle and retrieve his weapon for him.
Fight thru the bridge and gain entrance into the castle. Be the first to retrieve the Divine Weapon of Archangel, and return it to him will complete the event. With the Cloak of Invisibility, you will be allowed onto the castle grounds. Will you be able to infiltrate the castle and retrieve what is needed without fear?
When you have successfully created the Cloak of Invisibility, you may use it to enter the Blood Castle. To Create the Cloak of Invisibility you must combine a Scroll of Archangel and a Blood Bone of the same levels. You will need the level of cloak that will match the level of Blood Castle you will be entering.
How to enter in Blood Castle event
You will need to create the Cloak of Invisibility using the Scroll of Archangel, the Blood Bone, and a Jewel of Chaos. Only items of the same level can be combined to create the Cloak of Invisibility for that specific Blood Castle.
| Blood Castle entry level | |
| Level of Blood Castle | Level Restrictions (-20 LVL for MG and DL) |
| 1 | 15-80 |
| 2 | 81-130 |
| 3 | 131-180 |
| 4 | 181-230 |
| 5 | 231-280 |
| 6 | 281-330 |
| 7 | 331-400 |
| 8 | 400 (Master level) |
Blood Castle Rules
– Warping command will work in Blood Castle
– Only a maximum of 10 players are allowed per each Blood Castle level sub-server
– If you die in Blood Castle (you will not lose experience, lose zen, or drop items)
– Specific skills can be used in safety zone of Blood Castle ( Attack/Defense buff, heal, soul barrier, swell life)
Devil Square
Rewards
Devil Square rewards are rank-based: when the event ends the top four finishers each receive a bonus jewel along with extra experience and Zen, both scaling with the Devil Square level you competed in. Items that drop on the floor during the event are free to pick up by any participant.
Devil Square 1 — finishing rewards:
- 1st place: Jewel of Bless
- 2nd place: Jewel of Soul
- 3rd place: Jewel of Life
- 4th place: Jewel of Chaos
Devil Square 2 through 7 — finishing rewards:
- 1st place:
 Jewel of Nature
 - 2nd place: Jewel of Luck
- 3rd place:
 Jewel of Curse
 - 4th place:
 Jewel of Skill
Higher Devil Square levels award more experience and Zen on top of the jewel reward, making the higher brackets far more lucrative overall.
What is Devil Square Event?
In devil square only 10 characters are allowed at one time, and they need to have correct level of Devil’s invitation to enter. Devil invitation can be made by combining Devil Eye, Devil Key with a Jewel of Chaos in the Chaos Machine. In private servers Devil Square invitations are sold in npc’s from lorencia bar.
| Item | Item Drop level from Monsters |
| Devil’s Eye +1 Devil’s Key +1 |
Over LV.3(Goblin) |
| Devil’s Eye +2 Devil’s Key +2 |
Over LV.36(Elite Yeti) |
| Devil’s Eye +3 Devil’s Key +3 |
Over LV.47(Shadow) |
| Devil’s Eye +4 Devil’s Key +4 |
Over LV.60(Devil) |
| Devil’s Eye +5 Devil’s Key +5 |
Over LV.70(Lizard King) |
| Devil’s Eye +6 Devil’s Key +6 |
Over LV.80(Iron Wheel) |
| The Devil Square is separated into Level Restrictions: | |
| Level of Devil Square | Level Restrictions (-20 LVL for MG and DL) |
| 1 | 15-130 |
| 2 | 131-180 |
| 3 | 181-230 |
| 4 | 231-280 |
| 5 | 281-330 |
| 6 | 331-400 |
Devil Square Rules
– Warp command can be used after entering Devil Square.
– Other players are not allowed to enter after the 10 slots have been filled.
– When the character gets killed in Devil Square he will be warped back to Noria.
– PK is not possible in Devil Square.
– Characters who will remain in Devil Square after event it’s over will be moved in Noria.
Chaos Castle
Rewards
The last player standing receives a  Jewel of Excellent and an item box containing Ancient equipment — weapons, shields, helms, armor, pants, gloves and boots, all at the Ancient tier. Higher Chaos Castle levels expand the pool of Ancient items that can appear in the box.
What is Chaos Castle Event?
Chaos Castle it’s the place where mu warriors fight for prestige or prize,but there can be only one winner. To join the event you must find/buy Armor of Guardsman from NPC’s and right click on it, you are disguised to look like your enemies, where no one will be able to tell who’s who. A minimum of 2 players is required for event to start. (In private mu servers can start with 1 player)
The Chaos Castle is separated into Levels Restrictions:
| Chaos Castle Level | Character Level | Magic Gladiator / Dark Lord | Zen Amount |
| 1 | 15-49 | 15-29 | 25,000 |
| 2 | 50-119 | 30-99 | 80,000 |
| 3 | 120-179 | 100-159 | 150,000 |
| 4 | 180-239 | 160-219 | 250,000 |
| 5 | 240-299 | 220-279 | 400,000 |
| 6 | 300-400 | 280-400 | 650,000 |
| 7 (Master Level) | 400 | 400 | 850,000 |
Characters with 3rd Quest can enter only into Chaos Castle level 7!
Any player may enter the Chaos Castle as long as they fit into the minimum level requirements. The event will automatically start every 4 hours.
The strongest player will win the event. Players receive one (1) point for each player killed and two (2) points for killing a monster. During the event the Arena will decrease in size making it also possible to fall off the sides. If you will die or fall off the side you are eliminated from the event and will be teleported to Devias.
White Wizzard
The White Wizard and Orcs invade the Continent of Mu several times in a day with the Mission to cause fear among the inhabitants have the courage to stop it.
Places invaded by the White Wizard:
Lorencia, Devias, Noria at random coordinates.
Reward
By killing the White Wizard it will drop a Jewel of Bless.
By killing an Orc Archer Soldier it will drop Zen or Ring of Wizard.
Golden Invasion
Rewards
Golden Invasion starts every 2 hours at a random time. Golden monsters not listed here drop WCoin and Goblin Points when killed.
Golden Budge Dragon
Golden Goblin
Golden Rabbit
Golden Dragon
Golden Stone Golem
Golden Crust
Golden Satyros
Golden Lizard King
Great Golden Dragon
Golden Tantallos
Kalima
Rewards
Monsters throughout Kalima drop Ancient items — the Illusion of Kundun is a primary source. The deeper you go, the better the loot. Kalima 7 is the domain of Kundun himself, the server’s ultimate world boss, who drops the finest excellent-option weapons and the highest-tier ancient armor sets in the game — Eternal Wing, Titan, Brave, Phantom, Destroy, Seraphim, Divine, Royal, Hades and Tigris.
Kalima it’s a special map where players can enter only with invitation to fight with the Lord of Kundun and hunt ancient items. Invitation can be created by collecting 5 Sign of Kundun and you will receive a Kalima ticket. There are 7 gateways to Kalima and to enter these gateways, it is determined by each individual player’s levels.
|
Levels
|
|
|
|
General Characters
|
Magic Gladiator / Dark Lord
|
|
|
1
|
40 ~ 400
|
20 ~ 400
|
|
2
|
131 ~ 400
|
111 ~ 400
|
|
3
|
181 ~ 400
|
161 ~ 400
|
|
4
|
231 ~ 400
|
211 ~ 400
|
|
5
|
281 ~ 400
|
261 ~ 400
|
|
6
|
331 ~ 400
|
311 ~ 400
|
|
7
|
380 ~ 400
|
380 ~ 400
|
How to enter
Drop the Kalima Ticket outside the town or away from any safe zone and the ‘Magic Stone’ door will appear which leads you to your designated Kalima map.
In Kalima, there are no time restrictions, you are allowed to stay there as long as you like. However, you must remember that the monsters that awaits in the sanctuary are very powerful.
Monsters
Aegis, Lord Centurion, Blood Soldier, Death Angel, Necron, Death Centurion, Schriker, Illusion of Kundun (this one will drop ancient items)
Crywolf Fortress
[Rewards]
*Note: Rewards are only granted to players who remain in Crywolf until Balgass is defeated. Warping out before the end forfeits your reward.
Top contributor rewards: Players who deal the most damage to invaders throughout the battle earn a bonus jewel — Jewel of Nature for the top contributor, Jewel of Luck for second, and Jewel of Curse for third.
Dark Elf drops: The twelve Dark Elves each drop top-tier weapons and armor sets — including Bone Blade, Explosion Blade, Solay Scepter, Sylph Wind Bow, Grand Viper Staff, Storm Blitz Staff and Phoenix Soul Star, plus full sets from the Dragon Knight, Venom Mist, Sylphid Ray, Sunlight, Volcano, Storm Blitz and Phoenix Soul tiers. They also drop the custom jewels Jewel of Luck, Jewel of Skill and Jewel of Curse.
Balgass drops: The boss himself drops the very best weapons in the game — Knight Blade, Dark Reign Blade, Great Lord Scepter, Staff of Kundun, Arrow Viper Bow, Piercing Blade Glove and Demonic Staff — alongside full Demonic, Piercing Groove, Great Dragon, Dark Soul, Red Spirit, Dark Master and Hurricane armor sets. He also drops rare special items:  Gold Key,
  Sinestro’s Curse,
  Theli’s Return,
  Shadow of Atlas, Jewel of Excellent and Jewel of Nature.
[Server-wide effect on victory]
A successful Crywolf defence temporarily reduces monster strength across the server and improves Chaos Machine combination rates for all players. If the defenders fail, the opposite penalties apply until the next event.
(Wolf Altar Event – Mu Online)
Event Time:
Usually appears every 12 -24 hours. Depending on what time the server set the event time to be.
Location:
Crywolf Fotress (Coordinates: 122, 36)
Requierments:
1. Everyone can participate. In Our Mu Server. To battle in this event, you must at least make sure that your stats is half maxed. which means 30+ reset should be able to survive in this event, depends what items you have on also.
2. level 400 is recommended but not necessary. You just need to be able to warp to “Crywolf”
3. At least 1 High Elf above level 350 (to make the contract with the wolf altar – Maximum elf is 5 but not necessary to have)
[usually its only 1 or 2 elf that will be accepted in the contract]
How to enter Crywolf ?
Click “M” and scroll down then click “Crywolf” before the event starts
or you can Warp from Valley of Loren (Entrance coordinate: 164,35)
[Start of event: Stand-by mode]
*Note: The screen notice of event usually appears 10-20 minutes or so before the event starts. So you should have plenty of time to get there.
– The map will be turned into a safe-zone, with no monsters
– During the last 3-5 minutes before it starts, a Stand-By Mode takes effect. where you see the Balgass army preparing (short graphic show played) takes about 2 minutes or so. During this show, you will not be able to move except to just watch it until it completes.
[Afterward – Before the battle starts: Elf contract with wolf altar]
1. Waits for the wolf altar to set up (takes less than 5 minutes)
2. Watch the screen notice to see when the contract begins. Once the wolf altar opens 1 High elf should quickly click on 1 of the 5 altar available (the circle spots on the ground)
3. Once the High elf click one of the altar circle, a box comes out and just click “ok”. This will then bind the elf to the altar.
*Note: For the elf – Make sure that once you are connected with the altar, do not move out or warp or die during the event. This will cancel the contract and the event will end.
4. Once the contract have completed. wait for 5 minutes and the battle will begin.
[During the Battle]
1. Once the battle starts, make sure you don’t warp out from crywolf. This will end your participation in the event.
2. Players can’t use their personal store or talk to the NPC.
3. Once the contract complete, monsters will appear.
4. You will be given 10 minutes in the timer to kill all the monsters and Balgass (Boss Monster)
[1st Battle – Dark elf]
There will be other monsters but the main part is to:
1. Kill 12 Dark Elf.
In Mu Online server, these Dark elf once they are killed, they will drop Jewels or Talisman of chaos assembly or zen or item.
[2nd Battle – Balgass]
1. Once all the Dark Elf are killed. Kill Balgass (Boss Monster)
– He will appear when the time reach 5 minute (05:00) on the Time box available on your right bottom corner of your screen.
– Location of his appearance: Usually near the altar. So do protect your elf at the wolf altar because she must not move or die. If the elf dies it will end the event.
Kanturu Event
Rewards
Maya’s Hands drops: high-tier endgame weapons and armor sets — including Knight Blade, Dark Reign Blade, Great Lord Scepter, Staff of Kundun, Arrow Viper Bow, Piercing Blade Glove and Demonic Staff, plus full sets from the Great Dragon, Dark Soul, Red Spirit, Dark Master, Hurricane, Piercing Groove and Demonic tiers.
Nightmare drops: Rings and Pendants from every tier — Ring of Ice, Ring of Poison, Ring of Fire, Ring of Earth, Ring of Wind, Ring of Magic, Pendant of Lightning, Pendant of Fire, Pendant of Wind, Pendant of Water and Pendant of Ability.
Gemstone to Harmony Refining Tower
Location: Katuru 3 (coordinates: 141, 186)
Maximum of 15 players are allowed to participate.
Requirements to enter: Moonstone Ring
Ring must be equipped in the RING Section when you click your inventory “I” or “V”
Location of Moonstone ring: Drops from Kanturu 3 Monsters or Cash Shop (X-key)
When the Katuru Event Gate closes, please wait for 1-4 minutes to be re-open. Thus, the Kanturu event will start. If its already open, you may just click “enter” and it will lead you to the refinery tower, where Elpis NPC are.
[DURING THE KANTURU EVENT]
First Boss Battle “Maya’s Hands”
Wait 1 minute and the event will start:
[1st battle:]
Must Kill 50 Monsters then Maya’s Left hand will come out and need to be killed within 15 minutes.
[2nd battle:]
Wait 1 minute, Kill 50 monsters when it appears, Maya’s Right hand will come out and need to be killed within 15 minutes
[3rd battle:]
Wait 1 minute, Kill 50 monsters when it appears, Maya’s Both hands will come out and need to be killed within 15 minutes
Items dropped by Maya’s Hands: high-tier endgame weapons and armor sets — including Knight Blade, Dark Reign Blade, Great Lord Scepter, Staff of Kundun, Arrow Viper Bow, Piercing Blade Glove and Demonic Staff, plus full sets from the Great Dragon, Dark Soul, Red Spirit, Dark Master, Hurricane, Piercing Groove and Demonic tiers.
*Note: If you die in the event, you will be moved out to the safe zone of katuru3. and must wait until the event gate re-opens again.
If you win: Second Boss Battle “Nightmare”
Once Maya is defeated, players are moved to the second Boss Map to face Nightmare.
Second Boss Battle “Nightmare”
Life: 400000
Defense: 1000
Defense Success Rate: 420
Damage: 1225 – 1468
Players must kill Nightmare within 20 minutes. Nightmare will summon monsters three times and will warp out after his summons — players must kill all the spawns before they can finish him off.
Nightmare drops: Rings and Pendants from every tier — Ring of Ice, Ring of Poison, Ring of Fire, Ring of Earth, Ring of Wind, Ring of Magic, Pendant of Lightning, Pendant of Fire, Pendant of Wind, Pendant of Water and Pendant of Ability.
If you win: Refining Tower
– Refining Tower is opened for 23 hours if players have killed Nightmare.
– If The Tower opens, players does not need Moonstone ring to enter.
– Refining Tower is closed until Nightmare is defeated.
Function: Refines Gemstone into Jewel of Harmony
How to use:
1) Talk to Elpis
2) Click the “Refine Gemstone” button
3) Place Gemstone in the machine and press the “OK” button to refine.
4) If the combination is successful a Jewel of Harmony is produced, in the event the combination fails, the gemstone is destroyed.
5) There is only a 50% Success Rate to create a Jewel of Harmony
*Note: Strengthened Items created by dropping the Jewel of Harmony onto the item are automatically locked to your account, you will not be able to drop, sell, or trade these items until you remove the strengthened option.
To remove yellow option from harmony, you may talk to JORRIDON NPC in Aida – to remove it from your items.
Illusion Temple
Rewards
The winning team’s members each receive a jewel that scales with the Illusion Temple level they competed in. Lower levels award Jewel of Skill, mid-range levels award Jewel of Curse and then Jewel of Luck, and the highest tier — Temple 6, reserved for characters with a 3rd job class — awards Theli’s Return, one of the rarest jewels on the server.
What is Illusion Temple Event?
Mu characters can join this event using Ilussion Template ticket, this can be bought from NPC’s or create your own ticket in Choas Machine (Noria).
[Requirement] to create ticket:
– Ilussion Pergament
– Ilussion Blood Potion
– Jewel of Chaos
Put this items in chaos machine and pres combine it will result Ilussion Template Ticket.
Note: The combination can fail resulting in the loss of all materials.
The zone has five separate levels:
| Temple | Level |
| 1 | 220 – 270 |
| 2 | 271 – 320 |
| 3 | 321 – 350 |
| 4 | 351 – 380 |
| 5 | 381 – 400 |
| 6 | 400 (3rd job class) |
Once the event starts, players who are in are assigned to a random team and get a team uniform.
Red Team Skin Blue Team Skin
[How to Enter]
Once the event start has been announced you have 5 minutes time to go to the Illusion Temple Guard(Lorencia 130,130) and register for the level range you are in using the appropriate Illusion Template Ticket.
[During Battle]
Here’s a look at the layout of the zone. You can see the team’s two starting positions on the westernmost and easternmost sides of the map.
For each opposing player killed, the killing team gets five skill points which can be spent to temporarily improve their character during the event. On top of killing other players, there are 2 statues located in the event map, each holding an event ball.
Each team’s base also comes equipped with a pedestal, where players can bring back the event balls for points. Once a ball is taken from a statue, both statues disappear. They reappear again once a team returns the ball to their respective base.
The first team which is able to return the ball seven times first wins. So not only is it important to kill the opposing team as much as possible, but to also gather as many event balls as possible while preventing the opposing team from doing the same! The ball carrier will move in slow motion, so it’s important for his or her teammates to work together to protect the ball carrier from the opposing team. Once a ball carrier is killed, DC’s or leaves the event; the ball will fall to the ground and is able to be picked up by any player on either team.
Cherry Blossom
Rewards
Collect Cherry Blossom Branches and trade them to the Cherry Blossom Spirit NPC. Each branch colour has its own reward pool — one item is given per exchange:
White Cherry Blossom Branch (×10)
Jewel of ChaosJewel of BlessJewel of SoulJewel of Life Horn of Dinorant
 Demon
Demon Spirit of Guardian
 Red Cherry Blossom Branch (×30)
 Splinter of Armor
 Bless of Guardian
 Claw of Beast
 Jewel of GuardianJewel of Harmony
 Golden Cherry Blossom Branch (×255)
Sinestro's CurseTheli's ReturnShadow of AtlasDivine OrbJewel Of LuckJewel Of ExcellentJewel Of NatureJewel of Conquest Talisman of Chaos Assembly
 Cherry Blossom Spirit NPC can be found in Noria at coordinates: 179, 126
This event requires players to collect a certain amount of Cherry Blossom Branch and trade them with Cherry Blossom Spirit NPC, which rewards great items. The blossom branch can be received from dropping the Cherry Blossom Play-Box. The theory of this box is base on chances, it randomly gives you either White, Red or Golden Cherry Blossom Branch but it can also gives you potions that are based on limited times (30 minutes) and that can increase maximum hp/health , maximum mana or your damages.
Cherry Blossom Potions
|
Name
|
Features
|
Duration
|
| Cherry Blossom Rice Cake |
Increased Maximum HP +700
|
30 Minutes
|
| Cherry Blossom Wine |
Increased Maximum Mana +700
|
30 Minutes
|
| Cherry Blossom Flower Petal |
Damage +40 Increase
|
30 Minute
|
- To use this, you need to right click on the cherry blossom rice cake, wine or flower petal;
- Each aura can be used only once for 30 minutes;
- Disconnecting from the server or die will cause the aura to disappear.
Blossom Branch Types
White Cherry Blossom Branch
Red Cherry Blossom Branch
Cherry Blossom Branch Golden
Raklion Hatchery
Rewards
Defeating Selupan is among the most rewarding fights on the server. He drops top-tier items and items with sockets — Season 6 socketed equipment that lets you slot elemental Seed Spheres for powerful custom bonuses — as well as complete sets from the highest ancient tiers: Eternal Wing, Titan, Brave, Phantom, Destroy, Seraphim, Divine, Royal, Hades and Tigris, covering every slot and class.
Raklion Hatchery Event or La Cleon Event, takes place every 24 hours in the Muonline global server whereas on the private servers, it can be active for every 4 hours or less.
The passageway of this Event is called the Hatchery Gate Portal , which is located in a map called Raklion (coordinates: 147, 28) and the warp zone coordinates is: 175, 25.
Requirements:
- - All Characters with level 270 or higher can Enter. Except Magic Gladiator and Dark Lord can enter there at level 180 or higher.
- - Teleport to the map by using M command at level 280. (Magic Gladiator and Dark Lord with level 186 or higher)
Or/and
- - You can also use the chat system by typing “/ Move Raklion” to be teleported in faster. (Zen requirement: 15,000)
Structure of the Map:
– The safety zone, the hunting area, and the Boss Zone
Before the arrival of Selupan (Boss Monster) you will be able to move freely around the areas and maps. However, after Selupan appears within time, unfortunately you will not be able to use the M command to move until the event ends.
The maximum number of participants that are allowed to enter in the Hatchery is 10.
Event Stages:
1st: Kill all the Cooler monsters
2nd: Kill all the Spider Eggs
3rd: Kill Selupan Boss
Event will only start when this message is shown on the screen: “Raklion Hatchery portal is closed. Raklion Hatchery has started, kill all the spiders”
If Fail:
You did not kill the first Spider Eggs and Selupan will become immortal.
Each round is the per-requisite for the next stage. If you fail to kill the monsters during the stages within the time limits, your mission has failed.
Doublegoer
[Rewards]
To be successful:
- Killed and prevent all the monsters from entering the end portal / magic circle
- Finish before the time runs out
- Less than the 3 boss monster pass the portal
Defeating each stage boss drops a Box of Compensation (Bronze Treasure Chest). Completing the full run and reaching the portal rewards a Golden Treasure Chest containing high-tier weapons with excellent options — blades, staves, bows, scepters and spears across multiple power tiers, including endgame weapons such as Sword of Destruction, Dark Breaker, Dragon Spear and Demonic Staff. The specific weapons available are matched to your character’s level when you enter.
If Failed:
- Time runs out
- More than 3 monsters has passed the portal
- Your character died during the battle
If failed, you will not get any rewards. However, not to worry because you can always try this event again in 10 minutes after you failed the event or if no one has entered the event just yet.
What is DoubleGoer Event?
Double Goer Event is also called as Doppleganger Event. It is very easy and yet it is exciting at the same time. All you need to do is defeat all the monsters in the event map in order to protect a portal from those invading monsters.
Every time you enter this event, you will be teleported to different event maps, it is very rarely that you will get the same map every time. Which makes it more interesting than ever as these enchanted maps are filled with monsters awaits for you to battle them. But don’t worry, you will always get rewarded at the end.
[Requirements]
- Entrance Level: None (Any Level)
- You can enter as an individual or in a party.
- Maximum Participants in a Party: 5 Players
- Opening Time: Any time with 10 minutes intervals space
- Only one individual / party can enter each time (means if someone is in there you must wait until they’ve finished)
[How to Enter]
- Talk to NPC Lugard
- Location: Elveland / Elbeland (49,216) or Loren Market*Note: The level of map will be automatically adjusted according to the level of character.
- To Enter, you and your party members each must obtain a ticket
- This ticket is called: Mirror of Dimension
[Ticket]
Ticket: Mirror of Dimension
To get this ticket, you will need?
- 5 Signs of Dimension
- Each 5 Sign Dimension = 1 Mirror of Dimension
- It is converted automatically once you have 5 Signs
- These signs are drop by level 35 and above monsters in the continent of MU
Mirror of Dimension | Sign of Dimensions
[Completion of Event]
To complete this event is pretty simple, there are 3 stages in the one event map you entered. All you need to do is defeat the 3 boss monsters along the path to the portal at the end of them map within the time limit.
Approximate time limit are usually 10-15 minutes. So you should have plenty of time to defeat them.
*Note: The less time you have without killing those monsters, the more monsters will enter the portal
Imperial Guardian
[Rewards]
Map 1 – 6 (Mini Boss): Secromicon Fragments — collect one from each map to unlock the Sunday finale.
Map 7 — Final Boss: The Imperial Guardian boss drops a selection of Jewels — Jewel of Bless, Jewel of Soul, Jewel of Life, Jewel of Creation, Jewel of Guardian and Jewel of Chaos — along with bonus Zen. The Jewel of Guardian is especially valuable as it is required for crafting 3rd-level wings. Rewards scale with character level, so higher-level characters earn more valuable drops.
Fortress of Imperial Guardian is one of the newest event additional to the Mu Continents. This Event only works if you have a party with at least 2 players.
This Event runs for a week – Starts from Monday and ends in Sunday.
To be qualified to enter the Sunday Event to beat the Boss Monster. Each party must complete all the Barka’s 7 maps and obtain Secromicon pieces which will give you an entrance key to the Sunday Event.
Barka’s 7 Map:
- Monday: 1st Map
- Tuesday: 2nd Map
- Wednesday: 3rd Map
- Thursday: 4th Map
- Friday: 5th Map
- Saturday: 6th Map
- Sunday: 7th Map (Final Secromicon pieces) + The Boss Battle Time
You will get rewarded on Sunday, if you have defeated the Boss of this event.
If you can enter as many time you like until your get the Secromicon pieces within that particular day. Without the 7 Secromicon pieces (1 from each day) you cannot successfully complete this event quest.
[Requirements]
- Entrance: NPC Jerint the Assistant (Devias: 229,221)
- Entrance Level = Level 15 or higher
- Number of Participants = A party of Min 2 – Max 5
*Note: If you disband the party after entering the map, you will be summoned back to the village/ entrance
- Opening Time= Any time
- Only one party is allowed at a time. (You must wait until previous party is finished)
*Note: The level of map will be automatically adjusted according to the level of character
[Ticket + How To Enter]
To Enter?
- Every player in your team/party must obtain the ticket shown below to enter the event.
- Give this Ticket to NPC Jerint the Assitant
- There are 2 types of ticket that you must obtain for this event
[During Battle]
Time is the main key in success of the fortress of imperial guardian event.
Which means all party members must work together and synchronized within their attacks when they’ve entered the event. It is very crucial that everyone know their jobs within this event to decrease the chance of failure.
There are 3 Zone within 1 location, there are at least about 3 or 4 location within 1 map per day.
- Starting Point
Waiting Time : 1 min
– All party members should enter during this time.
- Battle Zone
Attack Time: 10 min
- Everyone need to kill all the monsters within 10 minutes to win.
- Warp Zone
Waiting Time : 1min
- Safe Zone / Ralax Zone – To repair item & regain energy
- Repeat above sequence for next location within the map of the day until you’ve reach the Mini Boss Map (Mini boss will give you the Secromicon Fragment pieces)
*Note: To win this event, its best if you have all type of the characters in your one party.
Recommended Combination Members:
- 1 BM + 1 Elf + 1 DL + 1 SM + 1 Summoner (This one is best)
- 1 Elf + 2 BM + 1 SM + 1 Summoner
- 1 DL + 1 Elf + 2 Summoner + 1 SM
- 1 SM + 1 Elf + 2 BM + 1 DL
- 1 Summoner + 2 DL + 1 SM + 1 BM
- 1 Rage Fighter + 1 Elf + 1 SM + 1 DL + 1 Summoner
[Completion of Event]
If Successful:
- Kill all the monsters within the time limit. Including the Boss Monsters
If Failure:
- Fail to kill monsters within the time limit.
- Character dies during the battle.
- Late or didn’t warp to a different/next zone during the waiting period.
- Disband party when the event start in the map.
Lunar Rabbit & Fortune Pouch
Two harmless treasure monsters roam the hunting maps around the clock — the Lunar Rabbit and the Fortune Pouch. They never attack and they never run, but they carry a lot of health, so bringing a party is the fastest way to crack one open. There is no schedule to wait for: kill one and another takes its place a while later.
Where they spawn
Both monsters appear at random spots across five maps:
Monster |
Maps |
How many |
Respawn |
| Lunar Rabbit | Lost Tower, Atlans, Tarkan, Aida, Kanturu |
5 per map — 25 in total |
30 minutes |
| Fortune Pouch | Lost Tower, Atlans, Tarkan, Aida, Kanturu |
5 per map — 25 in total |
30 minutes |
That is 50 treasure monsters alive on the server at any time — 25 Lunar Rabbits and 25 Fortune Pouches, ten of them on every one of the five maps. There are always plenty to hunt if you know where to look.
Lunar Rabbit rewards
Every Lunar Rabbit drops one reward. The gear it carries always comes out Excellent:
Thunder StaffBladeTiger BowSerpent CrossbowBattle Scepter Scale HelmScale Armor
 Scale Pants
 Scale Gloves
 Scale BootsSphinx MaskSphinx ArmorSphinx Pants
 Sphinx Gloves
 Sphinx BootsWind HelmWind ArmorWind PantsWind GlovesWind Boots
 Dragon Slayer ShieldLegendary StaffAquagold CrossbowCrystal SwordLighting SwordMaster Scepter
 It can also drop jewels instead:
Jewel of ChaosJewel of SoulJewel of CreationJewel of Bless Fortune Pouch rewards
Every Fortune Pouch drops one reward — pets, mounts and useful consumables:
 Horn of Uniria
 Guardian Angel
 Ale
Ale ImpHorn of Dinorant
 Or one of these jewels:
 GemstoneJewel of Guardian
 Add Stats
What are the add commands?
The add commands allows you to quickly add stat points such as Strength, Agility, Vitality, Energy or Command.
[Requirements]
– None
| Command | Effect | Example |
| /addstr <count> | Adds <count> to your current strength | /addstr 42 |
| /addagi <count> | Adds <count> to your current agility | /addagi 42 |
| /addvit <count> | Adds <count> to your current vitality | /addvit 42 |
| /addene <count> | Adds <count> to your current energy | /addene 42 |
| /addcom <count> | Adds <count> to your current command | /addcom 42 |
Post
What is the post command?
The post command allow you to you post a message which the whole server can see in their own chat.
[Requirements]
– Level 50
– 5000000 Zen
– No posts in the last 5 seconds
| Command | Effect | Example |
| /post <message> | Posts <message> to the global chat | /post WTS KB +9 |
Offline Trade
What are the offtrade commands?
The offtrade commands allow you to keep a shop online without keeeping the client open.
[Requirements]
– Must be in Loren Market
| Command | Effect | Example |
| /offtrade wcoin | Starts a WCoinP offline shop | /offtrade wcoin |
| /offtrade zen | Starts a Zen offline shop | /offtrade zen |
[Important — WCoin shops]
When you set up your store and then type /offtrade wcoin, there is a brief moment between
opening the store and the command taking effect. During that moment your prices are still treated as
Zen, so another player standing near you could buy your items for Zen before the WCoin
shop activates.
To avoid this, open the store in game with the exact name .::WCOIN SHOP::. — this protects your items during that brief window.
You can also use this method to safely walk through crowded areas while online:
just open a store named .::WCOIN SHOP::. — no need to run the /offexp command.
Offline Exp
What is Offline Exp?
Offline Exp lets your character keep farming and leveling while your game client is closed. After you run the command your client will close, but your character stays in the game hunting monsters — and remains in its party if it is in one, so the whole party keeps sharing experience.
[Usage]
Type the command followed by the skill your character should attack with (you can only choose one skill), then any pick-up options you want it to loot:
/offexp <skill> <pickup1> <pickup2> ...
Example: /offexp tripleshot zen jewels exc
[Cost]
Offline Exp is completely free of charge.
Note: the pick-up items feature is available only for players who purchased a VIP map.
Available skills per class
While farming offline these skills do not consume AG or mana.
| Class | Skill (pick one) |
| Elf | tripleshot or multishot or buff (buff only buffs party members in range) |
| Blade Knight (BK) | twistingslash or ragefulblow |
| Magic Gladiator (MG) | twistingslash or evilspirits or giganticstorm |
| Soul Master (SM) | evilspirits |
| Dark Lord (DL) | fireburst or firescream |
| Summoner (SUM) | lightningshock |
| Rage Fighter (RF) | darkside or chaindrive |
Elf note: for Elf attack skills, Infinity Arrow is granted automatically. If your Elf does not have the Infinity Arrow skill, you must keep your inventory full of arrows — with no arrows your character will not be able to kill monsters.
Pick-up options
Add any of these after the skill to choose what your character loots: zen, exc (excellent items), anc (ancient items), jewels.
The pick-up items feature is available only for players who purchased a VIP map.
Golden Key is always picked up automatically — you do not need to add it to the command.
Party Leader
What is the party leader command?
The party leader command allow you to move the party leader to another player.
[Requirements]
– None
| Command | Effect | Example |
| /partyleader <name> | Moves the party leader to <name> | /partyleader GigelBK |
Party Password
What is the party password command?
The party password command allows other players to join your party by whispering you the password.
[Requirements]
– None
| Command | Effect | Example |
| /partypass <password> | Changes your password to <password> | /partypass 1234 |
Takeover
What is the takeover command?
The takeover commands allows you to move AFK players from a spot. You must stay near them for the whole duration of the takeover, which takes 5 minutes.
[Requirements]
– Pet Rudolf
| Command | Effect | Example |
| /takeover <name> | Starts a takeover on <name> | /takeover GigelBK |
Jewels
Jewels are MU's currency of power — used to upgrade gear, craft wings and trade between players. The Chaos Goblin Machine in Noria combines jewels and items to craft wings and rare items (with a success chance).
| Jewel | Use |
|---|---|
| Jewel of Bless | Raises an item to +1…+6 — 70% chance on items without Luck (not safe). The core upgrade jewel. |
| Jewel of Soul | Raises an item to +7…+9 (can fail). Also used in crafting. |
| Jewel of Life | Adds and increases the Additional Option (+4…+28 extra damage/defence). |
| Jewel of Chaos | Fuels the Chaos Machine to craft wings, items and combine jewels. |
| Jewel of Creation | A rare jewel used to craft 2nd and 3rd level wings and high-end items. |
| Jewel of Guardian | Used to craft 3rd level wings and capes. |
| Jewel of Harmony | Adds Strengthener / JoH options that can be upgraded with refining stones. |
| Gemstone | Refined into Jewel of Harmony at the Elpis NPC. |
Custom Jewels
This server adds custom upgrade jewels beyond the classic set. Excellent options also come in rarity tiers — Common, Rare, Epic and Legendary — and these jewels are how you shape and perfect your gear toward an all-Legendary endgame.
| Jewel | Use | Success rate |
|---|---|---|
| Jewel of Luck | Adds the Luck option to an item (+5% critical damage, +25% Jewel of Soul success). | 50% |
| Jewel of Skill | Adds the item's Skill to a weapon that supports one. | 100% |
| Jewel of Excellent | Turns a normal item (up to +9) into an Excellent item, granting it Excellent options. | 50% |
| Jewel of Nature | Safely raises an item from +9 to +10, or +10 to +11 (the maximum). | 50% |
| Jewel of Curse | Adds or raises the Additional Option on rings and pendants. | 75% |
| Jewel of Conquest | Instantly raises an item or wings to +15. | 100% |
| Divine Orb | Re-rolls the rarity tiers of an Excellent item (up to +9), keeping any slot already at Legendary — the way to push gear toward all-Legendary. | 100% |
| Sinestro's Curse | Adds one more Excellent option to an item (up to +9) that already has Excellent stats. | 100% |
| Shadow of Atlas | Re-rolls which Excellent options an item (up to +9) carries. | 100% |
| Narcissus's Reflection | Fully empowers an item (up to +9) — maximum Excellent options plus Skill, Luck and full Additional Option. | 100% |
| Theli's Return | Re-rolls the number of sockets on a socketed item (up to +9). | 100% |
Bonus Info
Once a piece of gear is Excellent or Ancient and upgraded to +11 or higher, it gains a set of Bonus Options on top of its normal stats and excellent options. Every equipment slot has its own three bonuses, and they get stronger in three bands.
- The item must be Excellent or Ancient — a plain +15 item gets nothing.
- +0 to +10: no bonus options at all.
- Three bands: +11 / +12, +13 / +14 and +15.
- The slot decides the bonuses, not the item — every helm gets the helm set, every weapon gets the weapon set.
- All eight slots stack, and the lines are listed on the item tooltip both in-game and on this website.
The loadout below is just an example — a Great Dragon set with a Dark Reign Blade, a Dragon Shield and a Wing of Storm, all shown at +15. Hover any piece to see its full tooltip.
Excellent Dark Reign Blade Excellent Dragon Shield
 Excellent Great Dragon HelmExcellent Great Dragon Armor
 Excellent Great Dragon Pants
 Excellent Great Dragon Gloves
 Excellent Great Dragon BootsWing of Storm
 Weapon
| Bonus Option | +11 / +12 | +13 / +14 | +15 |
|---|---|---|---|
| Increases Excellent Damage Rate | +3% | +4% | +5% |
| Enemy's Defense Ignore Rate | +1% | +2% | +3% |
| Increases Damage | +4% | +6% | +8% |
Every weapon type shares this set — swords, axes, maces, spears, bows, crossbows and staffs.
Shield
| Bonus Option | +11 / +12 | +13 / +14 | +15 |
|---|---|---|---|
| Critical Damage Resistance | +5% | +7% | +10% |
| Excellent Damage Resistance | +5% | +7% | +10% |
| Enemy's Attack Return Rate | +1% | +1% | +2% |
The defensive counterpart to the weapon slot — it cuts exactly the damage types the weapon bonuses add.
Helm
| Bonus Option | +11 / +12 | +13 / +14 | +15 |
|---|---|---|---|
| Increases Maximum Life | +300 | +600 | +600 |
| Increases Maximum Defense | +500 | +500 | +500 |
| Increases Maximum SD | +4% | +6% | +8% |
Maximum SD is a percentage of your own SD pool, so it scales with your character.
Armor
| Bonus Option | +11 / +12 | +13 / +14 | +15 |
|---|---|---|---|
| Increases Attack Speed | +20 | +40 | +40 |
| Critical Damage Rate | +3% | +4% | +5% |
| Damage Reduction | +1% | +2% | +2% |
Attack Speed applies to both physical attack speed and magic speed.
Pants
| Bonus Option | +11 / +12 | +13 / +14 | +15 |
|---|---|---|---|
| Increases Excellent Damage Rate | +2% | +3% | +4% |
| Increases Double Damage Rate | +1% | +1% | +1% |
| Enemy's Defense Ignore Rate | +1% | +1% | +1% |
Stacks with the same options on the weapon slot.
Gloves
| Bonus Option | +11 / +12 | +13 / +14 | +15 |
|---|---|---|---|
| Increases Maximum Life | +300 | +600 | +600 |
| Increases Maximum Defense | +500 | +500 | +500 |
| Reflect Damage | +4% | +6% | +8% |
Reflect Damage sends a share of the hit straight back at the attacker.
Boots
| Bonus Option | +11 / +12 | +13 / +14 | +15 |
|---|---|---|---|
| Increases Maximum Defense | +200 | +250 | +300 |
| Increases All Stats | +100 | +150 | +200 |
| Increases Damage | +2% | +3% | +4% |
All Stats adds to Strength, Agility, Vitality and Energy at the same time — and it is applied before damage is calculated, so it feeds your attack too.
Wings
| Bonus Option | +11 / +12 | +13 / +14 | +15 |
|---|---|---|---|
| Increases Maximum Life | +500 | +1000 | +1500 |
| Increases Damage | +1% | +2% | +3% |
| Additional Damage (PvP) | +200 | +250 | +350 |
Applies to every wing tier, including capes and the custom Wings Lvl 2.5. Additional PvP Damage is flat damage added against players only.
Full loadout total
What all eight pieces are worth together, if every one of them is Excellent or Ancient at the same level:
| Bonus Option | All 8 at +11 / +12 | All 8 at +13 / +14 | All 8 at +15 |
|---|---|---|---|
| Increases Excellent Damage Rate | +5% | +7% | +9% |
| Enemy's Defense Ignore Rate | +2% | +3% | +4% |
| Increases Damage | +7% | +11% | +15% |
| Critical Damage Resistance | +5% | +7% | +10% |
| Excellent Damage Resistance | +5% | +7% | +10% |
| Enemy's Attack Return Rate | +1% | +1% | +2% |
| Increases Maximum Life | +1100 | +2200 | +2700 |
| Increases Maximum Defense | +1200 | +1250 | +1300 |
| Increases Maximum SD | +4% | +6% | +8% |
| Increases Attack Speed | +20 | +40 | +40 |
| Critical Damage Rate | +3% | +4% | +5% |
| Damage Reduction | +1% | +2% | +2% |
| Increases Double Damage Rate | +1% | +1% | +1% |
| Reflect Damage | +4% | +6% | +8% |
| Increases All Stats | +100 | +150 | +200 |
| Additional Damage (PvP) | +200 | +250 | +350 |
Getting there: Jewel of Nature takes an item safely from +9 to +10 and +10 to +11, and a Jewel of Conquest pushes an item or wings straight to +15. See Custom Jewels.
Orbs, Scrolls & Parchments
These items teach your character new skills when used. Find them by hunting monsters in the maps listed below.
| Item | Class | Drops from | Map |
|---|---|---|---|
| Orb of Summoning | Elf | Spider, Budge Dragon, Bull Fighter, Hound | Lorencia |
| Orb of Summoning | Elf | Worm, Ice Monster, Hommerd, Assassin | Devias |
| Orb of Summoning | Elf | Globin, Chain Scorpion, Elite Globin, Beetle Monster, Hunter, Forest Monster, Agon, Stone Golem | Noria |
| Orb of Summoning | Elf | Skeleton | Dungeon |
| Orb of Greater Damage | Elf | Skeleton, Worm, Ice Monster, Hommerd, Assassin, Yeti, Elite Yeti | Devias |
| Orb of Greater Damage | Elf | Stone Golem | Noria |
| Orb of Greater Damage | Elf | Skeleton, Larva, Cyclops, Ghost, Skeleton Archer, Hell Hound | Dungeon |
| Orb of Greater Fortitude | Elf / DK | Lich, Giant, Skeleton | Lorencia |
| Orb of Greater Fortitude | Elf / DK | Worm, Ice Monster, Hommerd, Assassin, Yeti | Devias |
| Orb of Greater Fortitude | Elf / DK | Hunter, Forest Monster, Agon, Stone Golem | Noria |
| Orb of Greater Fortitude | Elf / DK | Skeleton, Larva, Cyclops, Ghost | Dungeon |
| Orb of Greater Fortitude | Elf / DK | Great Bahamut, Silver Valkyrie, Lizar King, Hydra | Atlans |
| Orb of Greater Fortitude | Elf / DK | Mutant, Bloody Wolf, Iron Wheel, Tantalos | Tarkan |
| Orb of Greater Fortitude | Elf / DK | Death Tree, Forest Orc, Death Rider, Blue Golem | Aida |
| Orb of Greater Fortitude | Elf / DK | Alquamos, Mega Crust, Queen Rainier | Icarus |
| Orb of Impale | DK / MG | Worm, Ice Monster, Hommerd, Assassin, Yeti, Elite Yeti | Devias |
| Orb of Impale | DK / MG | Larva, Cyclops, Ghost, Skeleton Archer, Hell Hound, Hell Spider | Dungeon |
| Orb of Twisting Slash | DK / MG | Ice Queen | Devias (low chance) |
| Orb of Twisting Slash | DK / MG | Dark Knight, Gorgon | Dungeon (low chance) |
| Orb of Twisting Slash | DK / MG | Shadow, Poison Shadow, Curse Wizard, Death Cow, Devil, Death Knight, Death Gorgon | LostTower |
| Orb of Rageful Blow | DK | Death Rider, Blue Golem, Witch Queen, Hell Mainer, Bloody variants | Aida |
| Orb of Rageful Blow | DK | Mega Crust, Queen Rainier, Drakan, Alpha Crust, Phantom Knight, Great Drakan, Phoenix of Darkness | Icarus |
| Orb of Rageful Blow | DK | Zombie Fighter, Resurrected Gladiator, Ash Slaughterer, Blood Assassin, Burning/Ruthless Lava Giant | Vulcanus |
| Orb of Death Stab | DK | Hydra | Atlans |
| Orb of Death Stab | DK | Mutant, Bloody Wolf, Iron Wheel, Tantalos | Tarkan |
| Orb of Death Stab | DK | Death Tree, Forest Orc, Death Rider, Blue Golem | Aida |
| Orb of Death Stab | DK | Zombie Fighter, Resurrected Gladiator, Ash Slaughterer | Vulcanus |
| Orb of Death Stab | DK | Alquamos, Mega Crust, Queen Rainier, Drakan, Alpha Crust, Phantom Knight, Great Drakan, Phoenix of Darkness | Icarus |
| Orb of Fire Slash | MG | Great Bahamut, Silver Valkyrie, Lizar King, Hydra | Atlans |
| Orb of Fire Slash | MG | Mutant, Bloody Wolf, Iron Wheel, Tantalos | Tarkan |
| Orb of Fire Slash | MG | Death Tree, Forest Orc, Death Rider, Blue Golem | Aida |
| Orb of Fire Slash | MG | Alquamos, Mega Crust, Queen Rainier | Icarus |
| Orb of Penetration | Elf | Great Bahamut, Silver Valkyrie, Lizar King, Hydra | Atlans |
| Orb of Penetration | Elf | Mutant, Bloody Wolf, Iron Wheel, Tantalos | Tarkan |
| Orb of Penetration | Elf | Death Tree, Forest Orc, Death Rider, Blue Golem | Aida |
| Orb of Penetration | Elf | Alquamos, Mega Crust, Queen Rainier, Drakan, Alpha Crust, Phantom Knight, Great Drakan, Phoenix of Darkness | Icarus |
| Orb of Ice Arrow | Elf | Iron Wheel, Tantalos | Tarkan |
| Orb of Ice Arrow | Elf | Blue Golem, Witch Queen, Hell Mainer, Bloody variants | Aida |
| Orb of Ice Arrow | Elf | Queen Rainier, Drakan, Alpha Crust, Phantom Knight, Great Drakan, Phoenix of Darkness | Icarus |
| Orb of Ice Arrow | Elf | Zombie Fighter, Resurrected Gladiator, Ash Slaughterer, Blood Assassin, Burning/Ruthless Lava Giant | Vulcanus |
| Healing Orb | Elf | Hound, Elite Bull Fighter, Lich | Lorencia |
| Healing Orb | Elf | Elite Globin, Beetle Monster, Hunter, Forest Monster, Agon, Stone Golem | Noria |
| Healing Orb | Elf | Skeleton | Dungeon |
| Scroll of Fire Ball | DW / MG / SUM | Bull Fighter, Hound, Elite Bull Fighter | Lorencia |
| Scroll of Fire Ball | DW / MG / SUM | Chain Scorpion, Elite Globin, Beetle Monster, Hunter, Forest Monster, Agon, Stone Golem | Noria |
| Scroll of Fire Ball | DW / MG / SUM | Skeleton, Larva, Cyclops | Dungeon |
| Scroll of Power Wave | DW / MG / SUM | Hound, Elite Bull Fighter, Lich, Giant | Lorencia |
| Scroll of Power Wave | DW / MG / SUM | Worm, Ice Monster, Hommerd, Assassin, Yeti, Elite Yeti | Devias |
| Scroll of Power Wave | DW / MG / SUM | Beetle Monster, Hunter, Forest Monster, Agon, Stone Golem | Noria |
| Scroll of Power Wave | DW / MG / SUM | Skeleton, Larva, Cyclops | Dungeon |
| Scroll of Lighting | DW / MG | Lich, Giant, Skeleton | Lorencia |
| Scroll of Lighting | DW / MG | Worm, Ice Monster, Hommerd, Assassin, Yeti, Elite Yeti | Devias |
| Scroll of Lighting | DW / MG | Hunter, Forest Monster, Agon, Stone Golem | Noria |
| Scroll of Lighting | DW / MG | Skeleton, Larva, Cyclops, Ghost, Skeleton Archer | Dungeon |
| Scroll of Meteorite | DW / MG / SUM | Ice Monster, Hommerd, Yeti, Elite Yeti | Devias |
| Scroll of Meteorite | DW / MG / SUM | Larva, Cyclops, Ghost, Skeleton Archer, Hell Hound, Hell Spider | Dungeon |
| Scroll of Ice | DW / MG / SUM | Assassin, Yeti, Elite Yeti | Devias |
| Scroll of Ice | DW / MG / SUM | Larva, Cyclops, Ghost, Skeleton Archer, Hell Hound, Hell Spider | Dungeon |
| Scroll of Teleport | DW | Giant | Lorencia |
| Scroll of Teleport | DW | Worm, Ice Monster, Hommerd, Yeti, Elite Yeti | Devias |
| Scroll of Teleport | DW | Stone Golem | Noria |
| Scroll of Teleport | DW | Skeleton, Larva, Cyclops, Ghost, Skeleton Archer | Dungeon |
| Scroll of Poison | DW / MG | Yeti, Elite Yeti | Devias |
| Scroll of Poison | DW / MG | Ghost, Skeleton Archer, Hell Hound, Hell Spider, Elite Skeleton, Thunder Lich, Poison Bull Fighter, Dark Knight, Gorgon | Dungeon |
| Scroll of Poison | DW / MG | Bahamut, Vepar, Valkyrie | Atlans |
| Scroll of Flame | DW / MG | Elite Yeti, Ice Queen | Devias |
| Scroll of Flame | DW / MG | Hell Hound, Hell Spider, Elite Skeleton, Thunder Lich, Poison Bull Fighter, Dark Knight, Gorgon | Dungeon |
| Scroll of Flame | DW / MG | Bahamut, Vepar, Valkyrie | Atlans |
| Scroll of Twister | DW / MG | Ice Queen | Devias |
| Scroll of Twister | DW / MG | Hell Spider, Elite Skeleton, Thunder Lich, Poison Bull Fighter, Dark Knight, Gorgon | Dungeon |
| Scroll of Twister | DW / MG | Bahamut, Vepar, Valkyrie | Atlans |
| Scroll of Evil Spirit | DW / MG | Ice Queen | Devias (low chance) |
| Scroll of Evil Spirit | DW / MG | Gorgon | Dungeon (low chance) |
| Scroll of Evil Spirit | DW / MG | Shadow, Poison Shadow, Curse Wizard, Death Cow, Devil, Death Knight, Death Gorgon | LostTower |
| Scroll of Evil Spirit | DW / MG | Great Bahamut, Silver Valkyrie, Lizar King, Hydra | Atlans |
| Scroll of Hellfire | DW / MG | Great Bahamut, Silver Valkyrie, Lizar King, Hydra | Atlans |
| Scroll of Hellfire | DW / MG | Mutant, Bloody Wolf, Iron Wheel, Tantalos | Tarkan |
| Scroll of Hellfire | DW / MG | Death Tree, Forest Orc | Aida |
| Scroll of Hellfire | DW / MG | Alquamos, Mega Crust, Queen Rainier | Icarus |
| Scroll of Aqua Beam | DW / MG | Hydra | Atlans |
| Scroll of Aqua Beam | DW / MG | Bloody Wolf, Iron Wheel, Tantalos | Tarkan |
| Scroll of Aqua Beam | DW / MG | Forest Orc, Blue Golem | Aida |
| Scroll of Aqua Beam | DW / MG | Zombie Fighter, Resurrected Gladiator, Ash Slaughterer, Blood Assassin | Vulcanus |
| Scroll of Aqua Beam | DW / MG | Alquamos, Mega Crust, Queen Rainier | Icarus |
| Scroll of Cometfall | DW / MG | Iron Wheel, Tantalos | Tarkan |
| Scroll of Cometfall | DW / MG | Blue Golem, Witch Queen, Hell Mainer | Aida |
| Scroll of Cometfall | DW / MG | Zombie Fighter, Resurrected Gladiator, Ash Slaughterer, Blood Assassin | Vulcanus |
| Scroll of Cometfall | DW / MG | Queen Rainier, Drakan | Icarus |
| Scroll of Inferno | DW / MG | Resurrected Gladiator, Ash Slaughterer, Blood Assassin, Burning Lava Giant, Ruthless Lava Giant | Vulcanus |
| Scroll of Soul Barrier | DW | Bloody Wolf, Iron Wheel, Tantalos | Tarkan |
| Scroll of Soul Barrier | DW | Blue Golem, Witch Queen, Hell Mainer | Aida |
| Scroll of Soul Barrier | DW | Zombie Fighter, Resurrected Gladiator, Ash Slaughterer, Blood Assassin | Vulcanus |
| Scroll of Soul Barrier | DW | Mega Crust, Queen Rainier, Drakan | Icarus |
| Scroll of Teleport Ally | DW | Tantalos | Tarkan |
| Scroll of Teleport Ally | DW | Blue Golem, Witch Queen, Hell Mainer | Aida |
| Scroll of Teleport Ally | DW | Zombie Fighter, Resurrected Gladiator, Ash Slaughterer, Blood Assassin | Vulcanus |
| Scroll of Ice Storm | DW | Resurrected Gladiator, Ash Slaughterer, Blood Assassin | Vulcanus |
| Scroll of Nova | DW | Ash Slaughterer, Blood Assassin, Burning Lava Giant, Ruthless Lava Giant | Vulcanus |
| Scroll of Decay | DW | Ash Slaughterer, Blood Assassin, Burning Lava Giant, Ruthless Lava Giant | Vulcanus |
| Scroll of Gigantic Storm | MG | Ash Slaughterer, Blood Assassin, Burning Lava Giant, Ruthless Lava Giant | Vulcanus |
| Scroll of Critical Damage | DL | Tantalos | Tarkan |
| Scroll of Critical Damage | DL | Blue Golem, Witch Queen, Hell Mainer | Aida |
| Scroll of Critical Damage | DL | Zombie Fighter, Resurrected Gladiator, Ash Slaughterer, Blood Assassin | Vulcanus |
| Scroll of Critical Damage | DL | Queen Rainier, Drakan | Icarus |
| Scroll of Electric Spark | DL | Resurrected Gladiator, Ash Slaughterer, Blood Assassin | Vulcanus |
| Scroll of Fire Scream | DL | Blood Assassin, Burning Lava Giant, Ruthless Lava Giant | Vulcanus |
| Scroll of FireBurst | DL | Hydra | Atlans |
| Scroll of FireBurst | DL | Bloody Wolf, Iron Wheel, Tantalos | Tarkan |
| Scroll of FireBurst | DL | Forest Orc, Blue Golem | Aida |
| Scroll of FireBurst | DL | Zombie Fighter, Resurrected Gladiator, Ash Slaughterer, Blood Assassin | Vulcanus |
| Scroll of FireBurst | DL | Alquamos, Mega Crust, Queen Rainier | Icarus |
| Scroll of Chaotic Diseier | DL | Ash Slaughterer, Blood Assassin, Burning Lava Giant, Ruthless Lava Giant | Vulcanus |
| Scroll of Summon | DL | Ash Slaughterer, Blood Assassin, Burning Lava Giant, Ruthless Lava Giant | Vulcanus |
| Scroll of Wizardry Enhance | DW | Blood Assassin, Burning Lava Giant, Ruthless Lava Giant | Vulcanus |
| Drain Life Parchment | SUM | Elite Yeti, Ice Queen | Devias |
| Drain Life Parchment | SUM | Hell Hound, Hell Spider, Elite Skeleton, Thunder Lich, Poison Bull Fighter, Dark Knight, Gorgon | Dungeon |
| Drain Life Parchment | SUM | Bahamut, Vepar, Valkyrie | Atlans |
| Sleep Parchment | SUM | Ice Queen | Devias |
| Sleep Parchment | SUM | Hell Spider, Elite Skeleton, Thunder Lich, Poison Bull Fighter, Dark Knight, Gorgon | Dungeon |
| Sleep Parchment | SUM | Bahamut, Vepar, Valkyrie, Great Bahamut, Silver Valkyrie, Lizar King | Atlans |
| Weakness Parchment | SUM | Witch Queen, Hell Mainer | Aida |
| Weakness Parchment | SUM | Resurrected Gladiator, Ash Slaughterer, Blood Assassin | Vulcanus |
| Increase Block Parchment | MONK | Ice Queen | Devias |
| Increase Block Parchment | MONK | Hell Spider, Elite Skeleton, Thunder Lich, Poison Bull Fighter, Dark Knight, Gorgon | Dungeon |
| Increase Block Parchment | MONK | Bahamut, Vepar, Valkyrie, Great Bahamut, Silver Valkyrie, Lizar King | Atlans |
| Chain Lightning Parchment | SUM | Bloody Wolf | Tarkan |
| Chain Lightning Parchment | SUM | Blue Golem, Witch Queen, Hell Mainer | Aida |
| Chain Lightning Parchment | SUM | Zombie Fighter, Resurrected Gladiator, Ash Slaughterer, Blood Assassin | Vulcanus |
| Chain Lightning Parchment | SUM | Alquamos, Mega Crust, Queen Rainier | Icarus |
| Damage Reflection Parchment | SUM | Iron Wheel | Tarkan |
| Damage Reflection Parchment | SUM | Blue Golem, Witch Queen, Hell Mainer | Aida |
| Damage Reflection Parchment | SUM | Zombie Fighter, Resurrected Gladiator, Ash Slaughterer, Blood Assassin | Vulcanus |
| Damage Reflection Parchment | SUM | Queen Rainier, Drakan | Icarus |
| Berserker Parchment | SUM | Blue Golem, Witch Queen, Hell Mainer | Aida |
| Berserker Parchment | SUM | Zombie Fighter, Resurrected Gladiator, Ash Slaughterer, Blood Assassin | Vulcanus |
| Lightning Shock Parchment | SUM | Witch Queen, Hell Mainer | Aida |
| Lightning Shock Parchment | SUM | Resurrected Gladiator, Ash Slaughterer, Blood Assassin | Vulcanus |
| Innovation Parchment | SUM | Bloody variants | Aida |
| Innovation Parchment | SUM | Burning Lava Giant, Ruthless Lava Giant | Vulcanus |
| Chain Drive Parchment | MONK | Lizar King, Hydra | Atlans |
| Chain Drive Parchment | MONK | Mutant, Bloody Wolf | Tarkan |
| Chain Drive Parchment | MONK | Death Tree, Forest Orc | Aida |
| Chain Drive Parchment | MONK | Zombie Fighter, Resurrected Gladiator, Ash Slaughterer | Vulcanus |
| Chain Drive Parchment | MONK | Alquamos, Mega Crust, Queen Rainier, Drakan | Icarus |
| Dragon Roar Parchment | MONK | Lizar King, Hydra | Atlans |
| Dragon Roar Parchment | MONK | Mutant, Bloody Wolf | Tarkan |
| Dragon Roar Parchment | MONK | Death Tree, Forest Orc | Aida |
| Dragon Roar Parchment | MONK | Zombie Fighter, Resurrected Gladiator, Ash Slaughterer | Vulcanus |
| Dragon Roar Parchment | MONK | Alquamos, Mega Crust, Queen Rainier, Drakan | Icarus |
| Dark Side Parchment | MONK | Any monster | Arena |
| Dark Side Parchment | MONK | Blue Golem, Witch Queen, Hell Mainer | Aida |
| Dark Side Parchment | MONK | Zombie Fighter, Resurrected Gladiator, Ash Slaughterer, Blood Assassin | Vulcanus |
| Dragon Slasher Parchment | MONK | Witch Queen, Hell Mainer | Aida |
| Dragon Slasher Parchment | MONK | Zombie Fighter, Resurrected Gladiator, Ash Slaughterer, Blood Assassin | Vulcanus |
| Ignore Defense Parchment | MONK | Iron Wheel | Tarkan |
| Ignore Defense Parchment | MONK | Blue Golem, Witch Queen, Hell Mainer | Aida |
| Ignore Defense Parchment | MONK | Zombie Fighter, Resurrected Gladiator, Ash Slaughterer | Vulcanus |
| Ignore Defense Parchment | MONK | Queen Rainier, Drakan | Icarus |
Box Of Kundun
Boxes of Kundun are dropped by Golden monsters during the Golden Invasion. Choose a box level below to see its reward pool.
Box Of Kundun +1 Drops
Armor sets are shown by their armor icon. Matching pieces are listed under each set.
Excellent Pad ArmorAlso: helm, pants, gloves, boots Excellent Leather ArmorAlso: helm, pants, gloves, boots Excellent Bronze ArmorAlso: helm, pants, gloves, boots Excellent Vine ArmorAlso: helm, pants, gloves, boots Excellent Silk ArmorAlso: helm, pants, gloves, boots Excellent Kris Excellent Short Sword Excellent Rapier Excellent Katana Excellent Sword of Assassin Excellent Small Axe Excellent Hand Axe Excellent Double Axe Excellent Tomahawk Excellent Elven Axe Excellent Spear Excellent Dragon Lance Excellent Mace Excellent Morning Star Excellent Flail Excellent Battle Scepter Excellent Short Bow Excellent Bow Excellent Crossbow Excellent Golden Crossbow Excellent Elven Bow Excellent Battle Bow Excellent Arquebus Excellent Skull Staff Excellent Angelic Staff  Excellent Small Shield
  Excellent Horn Shield
  Excellent Elven Shield
  Excellent Buckler
  Excellent Kite Shield Excellent Dragon Slayer Shield Excellent Ring of Ice Excellent Ring of Poison Excellent Pendant of Lighting Excellent Pendant of Fire
 Box Of Kundun +2 Drops
Armor sets are shown by their armor icon. Matching pieces are listed under each set.
Excellent Scale ArmorAlso: helm, pants, gloves, boots Excellent Brass ArmorAlso: helm, pants, gloves, boots Excellent Bone ArmorAlso: helm, pants, gloves, boots Excellent Sphinx ArmorAlso: helm, pants, gloves, boots Excellent Wind ArmorAlso: helm, pants, gloves, boots Excellent Spirit ArmorAlso: helm, pants, gloves, boots Excellent Violent Wind ArmorAlso: helm, pants, gloves, boots Excellent Blade Excellent Gladius Excellent Falchion Excellent Nikea Axe Excellent Larkan Axe Excellent Crystal Morning Star Excellent Master Scepter Excellent Double Poleaxe Excellent Halberd Excellent Berdysh Excellent Light Crossbow Excellent Serpent Crossbow Excellent Serpent Staff Excellent Thunder Staff Excellent Gorgon Staff Excellent Book of Samut Excellent Mystery Stick  Excellent Skull Shield
  Excellent Bronze Shield
  Excellent Spiked Shield Excellent Ring of Fire Excellent Ring of Earth Excellent Ring of Wind Excellent Ring of Magic Excellent Pendant of Ice
 Box Of Kundun +3 Drops
Armor sets are shown by their armor icon. Matching pieces are listed under each set.
Excellent Dragon ArmorAlso: helm, pants, gloves, boots Excellent Legendary ArmorAlso: helm, pants, gloves, boots Excellent Plate ArmorAlso: helm, pants, gloves, boots Excellent Guardian ArmorAlso: helm, pants, gloves, boots Excellent Red Wing ArmorAlso: helm, pants, gloves, boots Excellent Storm Crow ArmorAlso: pants, gloves, boots Excellent Adamantine ArmorAlso: helm, pants, gloves, boots Excellent Sacred Fire ArmorAlso: helm, pants, boots Excellent Sacred Glove Excellent Sword of Salamander Excellent Light Saber Excellent Legendary Sword Excellent Heliacal Sword Excellent Lighting Sword Excellent Double Blade Excellent Crystal Sword Excellent Elemental Mace Excellent Great Scepter Excellent Light Spear Excellent Great Scythe Excellent Tiger Bow Excellent Bluewing Crossbow Excellent Aquagold Crossbow Excellent Legendary Staff Excellent Staff of Resurrection Excellent Book of Neil Excellent Red Wing Stick  Excellent Tower Shield
  Excellent Plate Shield
  Excellent Elemental Shield Excellent Pendant of Wind Excellent Pendant of Water Excellent Pendant of Ability
 Box Of Kundun +4 Drops
Armor sets are shown by their armor icon. Matching pieces are listed under each set.
Excellent Black Dragon ArmorAlso: helm, pants, gloves, boots Excellent Grand Soul ArmorAlso: helm, pants, gloves, boots Excellent Divine ArmorAlso: helm, pants, gloves, boots Excellent Thunder Hawk ArmorAlso: pants, gloves, boots Excellent Dark Steel ArmorAlso: helm, pants, gloves, boots Excellent Ancient ArmorAlso: helm, pants, gloves, boots Excellent Storm Jahad ArmorAlso: helm, pants, boots Excellent Holy Storm Claw Excellent Divine Sword of Archangel Excellent Thunder Blade Excellent Sword of Destruction Excellent Rune Blade Excellent Lord Scepter Excellent Divine Scepter of Archangel Excellent Celestial Bow Excellent Silver Bow Excellent Saint Crossbow Excellent Divine Crossbow of Archangel Excellent Bill of Balrog Excellent Divine Staff of Archangel Excellent Dragon Soul Staff Excellent Ancient Stick Excellent Book of Samut  Excellent Grand Soul Shield Excellent Dragon Shield Excellent Ring of Ice Excellent Ring of Poison Excellent Pendant of Lighting Excellent Pendant of Fire
 Box Of Kundun +5 Drops
Armor sets are shown by their armor icon. Matching pieces are listed under each set.
Excellent Dark Phoenix ArmorAlso: helm, pants, gloves, boots Excellent Great Dragon ArmorAlso: helm, pants, gloves, boots Excellent Dark Soul ArmorAlso: helm, pants, gloves, boots Excellent Hurricane ArmorAlso: pants, gloves, boots Excellent Red Sprit ArmorAlso: helm, pants, gloves, boots Excellent Dark Master ArmorAlso: helm, pants, gloves, boots Excellent Demonic ArmorAlso: helm, pants, gloves, boots Excellent Piercing Groove ArmorAlso: helm, pants, boots Excellent Piercing Blade Glove Excellent Dark Breaker Excellent Knight Blade Excellent Dark Reign Blade Excellent Great Lord Scepter Excellent Striker Scepter Excellent Dragon Spear Excellent Brova Excellent Great Reign Crossbow Excellent Arrow Viper Bow Excellent Aileen Bowr Excellent Staff of Kundun Excellent Demonic Stick Excellent Chromatic Staff Excellent Raven Stick Excellent Book of Lagle Excellent Cross Shield Golden Box
To open the Golden Box you need a Gold Key. Gold Keys drop randomly in game and can also be purchased from the shop.
Jewel Of Nature  Jewel of Life Bundle
  Jewel of Creation Bundle
  Talisman of Luck
  Jewel of Chaos Bundle
  Narcissus's Reflection Jewel of Harmony bundle of Jewel of Bless budle of Jewel of Soul Jewel Of Luck Jewel Of Excellent Sinestro's Curse Theli's Return Shadow of Atlas Divine Orb Jewel of Conquest Talisman of Chaos Assembly
 Silver Box
Open the Silver Box to receive one of the rewards below. It shares the same reward pool as the Golden Box.
Jewel Of Nature Jewel of Life Bundle Jewel of Creation Bundle Talisman of Luck Jewel of Chaos Bundle Narcissus's Reflection Jewel of Harmony bundle of Jewel of Bless budle of Jewel of Soul Jewel Of Luck Jewel Of Excellent Sinestro's Curse Theli's Return Shadow of Atlas Divine Orb Jewel of Conquest Talisman of Chaos Assembly Silver Key
Silver Key The Silver Key is the entry item for the Rift — every member of the party spends one when the rift opens. It drops all over the world, and the tougher the content you hunt, the better your odds.
Where it drops
| Source | Drop chance |
|---|---|
| Every monster in the world | Small |
| Blood Castle, Devil Square & VIP Maps | Higher |
| Battle Maps | Even bigger |
| Golden Monsters | Big |
Stock up on keys wherever you grind, then gather a party and jump into the Rift on Server 2.
Item Options
Every weapon and armor piece can roll powerful options that stack:
| Option | Effect |
|---|---|
| Item Level (+0…+15) | Raises base attack/defence. Pushed up to +6 with Jewel of Bless (70% without Luck), then +7…+9 with Jewel of Soul. |
| Additional Option (+4…+28) | Bonus damage or defence added with the Jewel of Life. |
| Luck | +5% critical damage and +25% Jewel of Soul success chance. |
| Excellent Options | Blue "exc" stats: Life/Mana after kill, damage %, defence rate, EXP bonus — the gold standard of gear. |
| Option Tiers | Every Excellent option rolls its own rarity per item — Common, Rare, Epic or Legendary — which decides how strong that option really is. Tiers show on every tooltip, in-game and on this website. |
| Ancient Options | Ancient sets (Hyon, Vicious, Gaion, Eplete…) grant set bonuses and extra stats. |
| Sockets & Seed Spheres | Season 6 socket gear lets you slot elemental seeds for custom bonuses. |